In the last instalment I had arrived and spent the night at the DOC camp site at Cowshed Bay......NB: I find that despite taking over 200 photos I missed some key points. So I have used some photos off the web and attributed them as necessary.
Day 4: Cowshed Bay to Mistletoe Bay Campsite
Day's four and five were both short 4 hour tramping days, the first from Cowshed Bay to Mistletoe Bay Eco Village, and then from Mistletoe to Anakiwa. I could have combined both days and arrived at Anakiwa a day earlier but it would have meant tramping 24 km over 8 hour's and quite frankly I could not be bothered walking so far in one day.
Also, it would have meant missing out on staying at Mistletoe Bay which was one of the highlights of the trip.
 |
| Cowshed Bay to Mistletoe Bay |
I was up at my customary early hour and messed around having breakfast etc. for about an hour before setting out on my days walk. I was on the track at 7.45 am and climbing back up to Torea Saddle, which was easier than I expected, it only took 15 minutes to get back to the QCT.
 |
| Dawn at Cowshed Bay, Day four |
I reached Torea Saddle in time to see the sun start to rise over the surrounding hills, then it was up, up and up as I climbed to the summit of pt 407, the second highest point along the whole QCT.
It was a bit of a cold and windy day, though I appreciated this cooling effect, as I heated up from climbing for so long.
 |
| View of Portage from Torea saddle |
 |
| Start of the QCT, from Torea Saddle to Te Mahia |
 |
| Track to DOC campsite next to this sign |
 |
| An idea of the up hill nature of the track in this section |
Image from: https://davidfromak.files.wordpress.com/2015/06/img_4789-sm-track-looking-uphill.jpg
The first part of the track is a constant climb to point 407 which is the high point for this section of the QCT.
 |
| 30 minutes up the track from Torea Saddle |
 |
| Picton from near point 407 |
 |
| Mixed native/exotic bush acting as wind shield on the QCT |
 |
| First high point of the day, Shamrock Ridge lookout |
 |
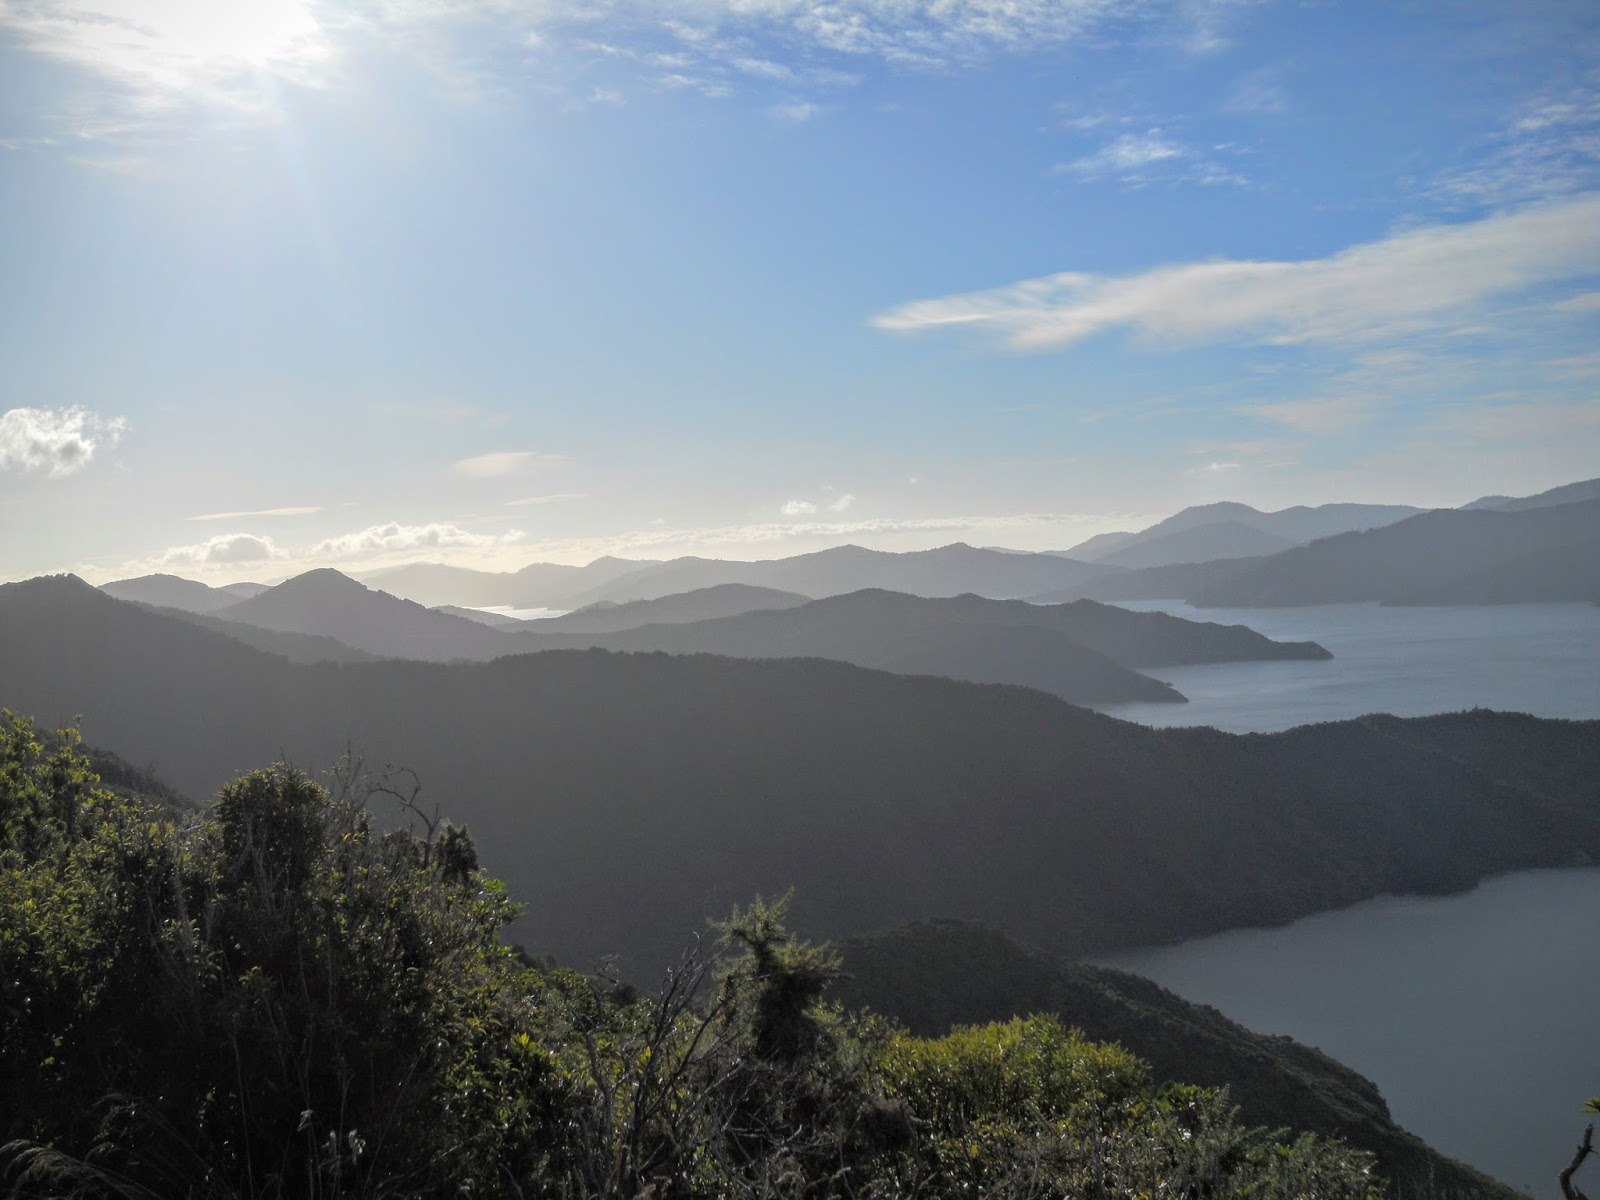
| View of Queen Charlotte Sound from high on the QCT |
The climb up to point 407 is frustrating as hell as there must be 20
false crests along the track, eventually you break out of the bush to
emerge at the final high point. There are a couple of seat on Pt 407 with views to both Queen Charlotte and Pelorous Sounds.
From here it is repeat of the previous day
with the track sidling up and down as it follows the ridge line out to
the West.
 |
| Queen Charlotte Sound from Point 407 |
 |
| Waikawa in the distance, first view |
The last 5 kilometres for this section are up and over the two high points in the photo below. Thankfully you don't have to climb over the second higher peak (pt. 415) to get to Te Mahia, as the track sidles the hill on the Pelorous Sound side of the ridge.
Still a bit of climbing to do though.
 |
| Te Mahia Saddle is on the reverse of Point 415 centre |
 |
| Lower reaches of Pelorus sound |
 |
| 4 more km's to Te Mahia |
I was walking amongst a tour group for most of the day, we kept overtaking each other as one or the other of us stopped for a break. The tour leader was a super fit looking older New Zealander who I am fairly certain was Graeme Dingle. I had read somewhere that he acts as a tour guide over the summer, if so he was doing well as he is now in his early 70's, a machine on the hill climbs as you would expect.
 |
| One of the guided tours on the Track |
I spotted one of those massive mega yacht's down in Pelorous Sound, it must have been a big one as it had a helicopter sitting on a launch pad at the rear....
 |
| Mega yacht cruising in Pelorous Sound |
 |
| View of Te Mahia Bay from near Te Mahia Saddle |
The final section of the QCT is a series of gnarly switch backs as the track descends to Te Mahia Saddle. I can imagine this is one of the areas the MTB fraternity go ape over as it looked like some truly awesome down hill, rock hopping fun....even I would give it a go!
 |
| Switch back down hill fun.... |
Image from: https://davidfromak.files.wordpress.com/2015/06/img_4835-sm-hairpin-bend.jpg
 |
| Track end at Te Mahia Saddle |
Te Mahia Saddle itself is very barren, it is basically a gravel parking area with little or no view of the Bays to either side. The next section of the QCT starts about 30 meters down hill as you head towards Mistletoe Bay.
 |
| Parking area at Te Mahia Saddle |
 |
| Road to Mistletoe Bay and start of final section of the QCT |
Image from: https://davidfromak.files.wordpress.com/2015/06/img_4845-sm-onahau-rd-track.jpg
Mistletoe Bay Eco Village
is at the end of the gravel road leading down from Te Mahia Saddle. It
takes about 20 minutes to get down to the sea level camp ground. Take
care on this road, it is quiet but narrow and winding, not so easy to
see approaching vehicles.
The first part of the village you pass is Jo Cottage which is an refurbished farm house with accommodation for 8 people, it looked very nice from the road.
The main part of the Eco village is another 2-3 minutes down the road.
 |
| Jo Cottage, one accommodation option at Mistletoe Bay |
Reception for the village is attached to the main dining hall. The level of amenity is high: there are toilets with coin operated showers, the dining hall (with free gas cookers, pots/pans, refrigeration and drinkable water), a laundry and a small shop attached to the reception area. The camp sites are in front of the ablution block and in a shaded area behind and to the side of the dining hall.
All this for only $16 per night! It is a real bargain, and well worth the loss of altitude to get to the camp.
 |
| Mistletoe Bay Reception and dining hall |
You can see one of the tent site area's in the photo below, you are able to camp anywhere on this grassed area but on the day it was empty as the prevailing wind was blowing dust strongly up valley and across this otherwise great spot.
 |
| View from the couch outside reception, Mistletoe Bay Eco village |
 |
| Inside the dining hall, Mistletoe Bay Eco village |
After setting up my tent, I had a shower, lunch, a cold drink + ice cream from the shop, then went for a stroll down to the jetty to see the afternoon ferry arrive to collect the day walkers.
Plenty of fish around and mussels/oysters on the rocks, it would be a good spot for a bit of fishing.
 |
| Mistletoe Bay with jetty and mud flats |
 |
| Interpretive sign near the Mistletoe Bay jetty |
 |
| Looking back towards the Eco Village |
I tried a new (for me) Back Country freeze dried for dinner, it was
Moroccan Lamb and Pumpkin Tagine and it was marvellous, really delicious and filling. I will be buying it again for future trips, definitely one of the better offerings from that company.
 |
| My dinner for the night, Moroccan Lamb Tagine and drinks |
 |
| Jon in the dinning hall, Mistletoe Bay Eco village |
The camp ground was about 1/3 full, 3 tramping groups and 3-4 camper vans, the manager said to me it had been fully booked for the last 3 months but that the numbers were going down as the season ended.
I really enjoyed my stay here, I heard a couple of kiwi calling about 2 or 3 in the morning and the stars were awesome in the totally clear sky. I have been talking to my wife Kathryn about visiting with the kids some time as it was so tranquil and really beautiful.
Day 5: Mistletoe Bay to Anakiwa
After a very restful night at Mistletoe (10 hours sleep!!!!!), I set out on the last 4 hours of the tramp to Anakiwa. To start, you need to follow your path back up to Te Mahia Saddle, about 30 minutes on the gravel access road.
You can also use the Julius Vogel track to get back to the saddle, but a tramper I talked to at Mistletoe Bay said it was a lot longer and overgrown in places, more like your usual DOC back country track.
Bear this in mind if you are thinking about using it....
 |
| Mistletoe Bay on the climb out from the Eco Village |
 |
| Te Mahia Saddle to Anakiwa |
 |
| Start of the track between Te Mahia and Anakiwa |
Initially the track climbs steadily away from Te Mahia Saddle, but it is nowhere near as steep as the other hill climbs. It is also liberally provided with picnic tables and seats if you feel the need for a rest. I would have to rate this the easiest section of the track by far, as well as being quite scenic in several places.
 |
| Nice track for this day |
 |
| Sedimentary sub strata visible from the track |
 |
| Nice thick punga forest alongside track |
 |
| The anticipation is starting to build... |
 |
| One of the areas of duck board over swamp area |
As an aside, you are going to strike three types of ground surface on the QCT: dirt, loose rocks and sandstone sheets, photos are included below for your edification....
 |
| Track types: 1: Dirt |
 |
| Track types: 2: loose rock |
 |
| Track types:3: Sandstone sheets |
I happened upon a Weta on the track at one point, this one was about 10 cm long (4 inches) and was obviously on his way home after a long night of nefarious insectoid pursuits.
I helped him off the track with a stick...
 |
| Giant Weta sitting on the track |
 |
| Mature Macrocarpa trees at old farm site |
 |
| Typical dense bush in side stream |
 |
| Introduced grass along track |
 |
| Feral goat spied in the bush |
About an hour after leaving Mistletoe you strike a headland with views down over the Sound, you can see the heavy cloud cover I had on the day...
 |
| View back to Mistletoe Bay after an hour on the track |
 |
| Interislander ferry heading for Picton |
There are still a couple of farms along this section of the track but I imagine it is not a lucrative undertaking as the farms have a bit of a hard scrabble look about them.
 |
| Horse on one of the still existent farms |
 |
| More horses in same area |
 |
| Torrey Channel, route of the Wellington ferries |
 |
| Anakiwa at head of Sound to right |
It looked very stormy over the outers Sounds area, I heard later that the ferries had 4-5 metre swells to contend with out in Cooks Strait, which must have been fun.
 |
| Storm building over outer sounds |
 |
| Waikawa in the distance |
 |
| The last 10km's of Queen Charlotte Sound |
 |
| Almost there.... |
The last 5 km's of the track are very nice with dense bush, punga groves and mature podocarp trees all along the route.
 |
| Picturesque track as you near Davies Bay |
 |
| Selfie on the Queen Charlotte Track |
 |
| Anakiwa in the mid distance |
After 2-3 hours you start to turn into Davies Bay, where there is a DOC camp site and shelter.
 |
| Last kilometre heading to Davies Bay |
 |
| Davies Bay foreshore, you can camp here! |
https://davidfromak.files.wordpress.com/2015/06/img_4909-sm-davies-bay-beach-1358.jpg
 |
| Turn of to the Davies Bay Shelter |
I stopped for a long lunch at the
Davies Bay Campsite, about an hour from the end of the track. I arrived at 11 am, about 3 hours after setting out from Mistletoe Bay and proceeded to make myself comfortable. The camp site looks very nice with a lot of space for tents in a well maintained clearing in the forest. I stayed till 1pm as I knew it would be a nicer spot to waste some time than the shelter at Anakiwa.
It would be a good spot for a family camping holiday as it is close to the track end, the track from Anakiwa is easy and it has excellent access to the nearby Davies Bay foreshore. The forest surrounding the shelter is beautiful with a lot of bird life to be seen and heard, including a NZ Falcon which kept flying over the clearing.
 |
| DOC Davies Bay camp site |
 |
| Cooking Shelter at Davies Bay camp site |
 |
| Davies Bay camp site |
I had my lunch and a couple of hot brews as I waited and talked to the various people who stopped by like me for a break on the way to other places.
I didn't get a single sand fly bite the whole time which makes me believe they have died off for this year, as this should be prime sand fly territory.
 |
| Jon with brew at the Davies Bay camp site |
 |
| Foreshore looking out on Davies Bay |
 |
| Very nice track over the last three kilometres |
 |
| Nearly there.... |
 |
| Ohhh yeaahhhhh..... |
It is about 40-50 minutes from Davies Bay to the end of the track, you walk off the QCT and immediately strike civilisation in the form of holiday homes and the Outward Bound School.
It is a bit of a jarring transition.....
 |
| QCT track end at Anakiwa |
 |
| Walking off the end of the QCT |
Below is the official end to the QCT, the shelter and Anakiwa proper are another 5 minutes walk down an access road.
 |
| QCT track head, Anakiwa |
 |
| Close up of QCT track head |
 |
| Yacht marina at Anakiwa |
I could easily have Forrest Gump'ed it and turned around and started walking back to Ship Cove, I can see why some people get into the long trail mentality. After a couple of days you get into a trail rhythm and really start to enjoy the experience.
 |
| 71 kilometers to Ship Cove anyone....? |
A woman sitting in the shelter gave me a "Woo Hoo" as I walked off the track, I really appreciated it as walking by yourself robs you of a feeling of accomplishment sometimes.
There is a nice shelter at the end of the track for those waiting on the Picton ferry, it provides a place to get out of the sun/wind and had a lot of track information and a selection of books for the use of those who visit. There are also DOC toilets nearby but no water source so fill up at Davies Bay campsite before you leave...
There is a ticket vending machine where you can buy a
QCTLC track pass if you don't have one and are starting the QCT from this end.
 |
| The QCT shelter at Anakiwa |
There is a well placed coffee cart cum snack stall right next to the QCT shelter, it opens from 2.30 pm onwards and caterers mostly to those waiting for the ferry. It is a summer side business attached to the
Anakiwa 401 lodge co located there and sells coffee, cold drinks, ice cream, snacks and a very limited range of tramping food (noodles/rice/soup etc.)
 |
| Anakiwa 401 coffee cart |
I'm not usually a coffee guy but the Cappuccino I had went down a real treat as it was cold and windy here.
 |
| Anakiwa Jetty in deteriorating weather |
Thank God for the QCT shelter because the weather got worse and worse as the day progressed. The Cougar Line ferry arrived early at 3.25 pm and as all passengers were present we set off for Picton in rough, windy sea conditions.....25 minutes later we were back in the big smoke.
I was equally happy and sad for this tramp to be ending. I enjoyed it a lot but was happy I would be sleeping in a bed and eating a salty, greasy burger and fries for dinner (which I did, it was tres bon!).
Cost breakdown for this section:
Queen Charlotte Track (2016)
Transport: $265.00 (Ferry + cost to get to/from Picton, ferry was $95 to Ship Cove)
Accomodation : $182.00 ( or $30 per day for through hikers to stay at a YHA)
Food: $ 60.00
Misc: $ 60.00
Total: $567.00
Some thoughts on the Queen Charlotte Track
On a positive note, this was an awesome trip, I will be back to walk the track again this time from South to North. When I come back I will stay in the lodges and have my gear shifted each day by boat, I will eat at the restaurants and generally act like a tourist.
I loved the interaction with various groups everyday, even though I was on my own, I had plenty of folk to talk too.
All of the camp sites were excellent, the best by far was Mistletoe Bay, the worst was Cowshed but only because it was windy, dusty and lacking grass on the tent sites. I love those cooking shelters, give us more of those DOC and more people will use tents instead of huts.
A few negative things i would like to comment on as well.
Firstly the track is more gnarly than the promotional material would suggest. There is a lot of hill climbing to be done, some sizable distance's and some high and weather prone ridges to cross. I was ready for this but how many tourist's walk the track and think "Jesus, those kiwis are crazy bastards.....!"
Reading the promo material it sounds like a walk in the local park, it is not!
I was generally appalled with the level of gear people were using: $40 Warehouse tents/sleeping bags, no wet weather or cooking gear and a lack of proper food. This may suffice in beautiful Summer weather but we all know how changeable it is in New Zealand. If you got caught on one of these high ridges in a storm you would be buggered with this shoddy gear. It may only take you 3 days to walk the track, but you could easily be dead from hypothermia in 3 hours. Take proper gear!
As to the MTB aspects of the track, apart from the Te Mahia to Anakiwa section how do you ride this track? Mostly I saw swearing, sweaty MTB riders pushing bikes up big hills. I talked to 4-5 of them at various times and they all agreed that this is not a riders trail. To steep, too crowded, too many places to dead yourself. I'm not really a MTB rider, so it is not for me to judge....
Aside from that, go walk the Queen Charlotte Track, either as part of the Te Araroa or just for a tramp, it totally rocks!