Showing posts with label Tramping Equipment. Show all posts

Sunday, 14 May 2023

Tramping Equipment: Sea to Summit Ultralight Insulated Sleeping Mat

  A new Sea to Summit sleeping mat for 2023

Here is a new piece of kit my partner Karen brought me for my birthday back in August of 2022. It is a Sea to Summit Ultralight Insulated sleeping mat. I have already used this beauty a couple of times and it made for a comfortable night's sleep.

Sea to Summit Ultra Light sleeping mat

Sea to Summit are one of the larger outdoor gear brands and they make a range of tents, packs, sleeping bags and other outdoor kit for the backcountry adventurer. I have quite a bit of their gear mostly cooking equipment like cutlery, plates, cups and mugs but this is the first sleeping mat I have owned from this company.

Various inflation settings for the Ultralight Mat

The Ultra Light Insulated comes in a number of sizes from X-Small through to Large. My mat is the large size and it is plenty wide and long enough to fit my 6'3" frame onto with space to spare. 

Sizes in the Ultra Light mat range compared to a water bottle

Part of the comfort and warmth of the mat is provided by the air cells in the mat. They make small pockets of air under you as you are laying on it which protect you from the ground. The mat has a soft finish to the outer material and it was reasonably quiet when you roll around on it at night. 

Air cell construction adds comfort and warmth

When packed the mat is about the size of a large Nalgene bottle so it is a compact item. There is a stuff sack/pump bag for inflating the mat which is becoming a standard feature for most sleeping mats. It only required five bags of air to fully inflate so it is a breeze to use. 

Ultralight mat compared to a drink bottle

My mat has a insulation layer inside and its R-Value (or measure of how warm it is) is 3.1. This means it would be good to down around 2 degrees Celsius but it would not provide enough warmth for temperatures lower than this. The R-Value can be extended by adding a foam mat underneath but you should really be looking at a mat with a 4.5 or above R-Value for proper winter camping. 


The Ultra Light Insulated has a 3.1 R-Value

This mat would be best suited for use in summer and the shoulder season either side so here in New Zealand that would be from November through March. That is right in the main TA season so this would be the dogs bollox for walking the trail. 

When inflated it is about 2" thick (5 cm) so it is actually quite comfortable to sleep on. It is thick enough for people like me who sleep on their side to keep your hip up off the ground. 

Technical specifications of the Ultralight Mat

My mat is 600 gm's in total which is not super light but is quite competitive when compared to other brands like Klymit and Thermarest for the same size and R-Value. Sea to Summit are certainly cheaper with this mat retailing for around $320 as compared to the $550 price for a NeoAir XLite from Thermarest. 


All in this looks like a really good sleeping mat and I look forward to using it in the future. 


The Ultralight in use...

So far I have only used this mat on one trip which was my Hawdon Valley camp back in January 2023. As I said at that time I am looking to do more camping trips before I get to old to handle them. My intention is to do several tramping trips a year solely as camping tramps as well as some overnight "Wild Camping" trips.  

Jon on his camp in the Hawdon Valley

The sleeping mat performed well and I had a good nights sleep using the mat and my Big Agnes Tent. It is an excellent summer weight mat and it could probably be used down to temperatures around 5 degrees with ease. It was 15 the night I was out and I was actually a bit warm...

Sea to Summit Ultralight mat in the Big Agnes tent

The mat fitted into my one person tent and it is a good size to allow me to store gear at the head of the tent with the mat laying flat on the tent floor. For most of the day I had it folded up or stashed behind me so I could sit on the floor of the tent to read, cook etc. 

Gear packed on the last day of the Hawdon Valley camp

This will now become my go to summer sleeping mat and will replace my older Pacific Outdoor mats I have been using for the last 10 years. I am still in the market for a warmer autumn/winter sleeping mat and I am looking at another Sea to Summit product the Ether Light XT. It has a slightly higher warmth rating and is 10 cm's thick so it would be more comfortable. 

The Sea to Summit Ether Light XT sleeping mat


As always cost is a factor i.e. I need to save up some money to be able to buy another mat so we will see what happens. Keep an eye out for future trips where I am using this piece of equipment. 

Sunday, 5 March 2023

Tramping Equipment: Orson Indie 1P UL Tent

 Another tent for the tramping equipment cupboard

Over the weekend I brought myself a new lite weight tramping tent to add to my already extensive stable of shelters. It is the one person Orson Indie 1P UL Tent which is another lite weight shelter for use on my tramping and back country adventures. 

The Orson Indie 1P UL tent

Orson tents are made in conjunction with Intents Outdoors an Auckland based importer of outdoor equipment. Orson is their new in house brand manufactured overseas to NZ specifications. Intents Outdoors have existed from the mid 2000's and provide a range of outdoor gear including tents, shelters, camping gear, camp kitchen and car camping items. 


The Intents Outdoors website

The Indie 1P UL is a tarp shelter which means it can be erected with a treking pole or optional tent pole. I always carry a set of trekking poles so it makes sense to use a tarp tent as a lite weight shelter. The Indie 1 weighs in at just over 1 kg and is long enough, wide enough and tall enough to provide space for myself, my sleeping pad and my gear. 

Dimensions of the Indie 1P

The Indie 1 is a pyramid style tent with a outer fly with a 4000mm water rating and a 8000mm rated floor. It will have significantly more water protection than my Big Agnes tent which will allow me to camp further into the summer shoulder seasons. 


Indie 1P UL tent in green...side view

The tent is available in either bright orange or a mid green color (mine is green) and they are a combination of sil nylon, polyester and netting material. It has one vestibule and one opening and needs to be pegged to the ground to erect. The outer fly and inner tent can be erected separately, together or outer first so the inner can be kept dry if erecting in rain. 

You can also buy the Indie 1P in this bright orange color

The tent packs down to a relatively small size and has its own waterproof stuff sack for storage when not in use. There is a set of 9 Y shaped aluminium pegs and I will replace 2-4 of these with longer V stakes for the foot and head. 

The Indie 1P comes with a waterproof drybag

The inner dimensions of the Indie 1P are roughly the same as my Copper Spur UL 1 and like that tent this is a single person shelter. The Indie is a little bit taller so I will have to take some care when pitching as it will probably be more prone to wind.  This is a minor problem for me as I do not often pitch my tent on exposed hills. 


I have seen a number of other people using this tent here in New Zealand and it is the main shelter of one of the tramping vloggers I like to watch. I brought this tent from Hunting and Fishing at Tower Junction and it cost $350 NZ Dollars. This is the first time I have seen these tents here in Christchurch and H & F had a good selection of the Orson tent range in stock. 


There are two optional additions to this tent with either a metal or carbon fiber pole available and a ground sheet cut to the correct dimensions for the tent. I have ordered a metal pole for the tent but I'm not sure if I will order a ground sheet to go with it. The pole cost $30 from Intents Outdoors an online store here in New Zealand.

I have already ordered one of the optional Indie metal poles

I usually cut some plastic sheeting to size for a footprint and use this as it it is lighter and more durable than a nylon groundsheet. I have also used Tyvek and space blankets for ground sheets in the past so I will have to decide what I want to use with this shelter. 

Optional Indie1P footprint is about $60 NZD


 I am looking forward to getting this out and into the backcountry to see how it performs. 

The Indie 1 in use...

There is nothing to see here yet as I have not had the opportunity to pitch the tent. 

Here are a couple of photos I found showing the tent pitched. This particular instance is using the optional metal pole you can purchase for this tent and a treking pole. I have already ordered one of the poles from Intents Outdoors and I expect it to arrive in the mail sometime this week. 


Side view of a pitched Orson Indie 1P using trekking pole

Another view of a pitched Orson Indie 1P with metal pole

I will be taking this outside and pitching it as soon as we have some dry weather so I can practice raising and lowering before I need to use it on a tramp. I will add some photos to this post when I have been able to do so. 

Monday, 4 July 2022

Tramping Equipment: Macpac Uber Lite down jacket

 ...My new winter clothing items...

Here is my latest outdoor equipment purchase the Macpac Uber Lite down jacket. I brought this recently in the Macpac winter sale and with the sale prices and club membership discount it cost me only $99 New Zealand dollars. 

The Macpac Uber Lite Jacket

I have previously owned a down jacket for using on my tramping trips but have not used it for several years as it became too small to fit my body. I could not do the zip up on the front as my advancing years and increasing chonk meant it was too small. You must be able to zip up your down jacket to keep in the air which warms you. 

Front zipper on the Uber Lite from Macpac

As you would have seen my go to warm layer is a Hunting and Fishing fleece top. these have many good features the best of which is ease of drying, warmth when wet and durability. The main problems with these tops is their bulk and weight...my fleece easily tops 500 gm's. 

Down jackets by comparison are super lite weights and pack down to basically nothing. this jacket is around 300 gm's and packs down to the size of a 600ml coke bottle. Down is significantly warmer for weight than fleece but they are useless if wet and are not as robust as your average fleece jacket. 

...the Uber Lite weighs in at 300 gm's...

Here are some specifications about the Uber Lite jacket:

Inner fabric: 100% Nylon

Fill Type: 90/10 RDS Duck Down

Fill Power: 650

Fill Weight(gms): 120 (4XL)

Main Fabric: 100% Nylon

Weight: 320gms (size 4XL)


The Uber Lite has a main zip up the front of the jacket from waist to neck and a padded collar around the neck to retain heat. It has two external zipped pockets and two internal pockets for gear storage. The fit is loose rather than athletic and sizes range from XS to 4XL in the men's jacket. There are jackets with and without a hood but hooded jackets go to size 20/3XL only!

Macpac Uber lite jacket...front

...zip pockets on the Uber Lite jacket...

The Uber jacket comes with a nifty waterproof Nylon bag which is the correct size to hold the jacket. Remember...stuff your jacket into the carry bag and do not fold it or roll it. All down products should be stuffed and not folded to prolong life of the insulation. 


Loose fitting through the back...Uber Lite

There are four colors with Black/Blue/Olive Oil/Tapestry and I currently own two Uber Lite jackets one in Olive Oil and one in Tapestry. Only the Tapestry and Olive Oil go up to size 24/4XL the black and navy blue variants are only to size 20/3XL...
The Uber Lite in 'Olive Oil' color...


Uber Lite jacket in 'Tapestry'


I have only worn the jacket a couple of times so far and I find it comfortable, warm and easy to use. I took it with me on my recent Christchurch 360 Trail trip and it worked well. I will put up some photos of the jacket in action once I take it out on some adventures. 

Wearing my Uber jacket on the Christchurch 360 Trail

Here I am at a park at McCormicks Bay on the way to the end of this section of trail...

At Indie's Park while walking from Scarborough to Mt Pleasant

You are sure to see my Uber Lite jackets going into the future and the next opportunity will probably be when I visit the Able Tasman Coast Track in early August. 


You Tube: Macpac Uber Lite jacket 


Wednesday, 20 April 2022

Tramping Equipment: Canon M50 Mark II camera

A quick look at my tramping camera...

I recently upgraded my camera equipment from the older point and shoot camera I had to a new Canon mirrorless camera with more advanced features. I am hoping that the new camera will enable me to produce better quality images for both this blog and my You Tube channel. 
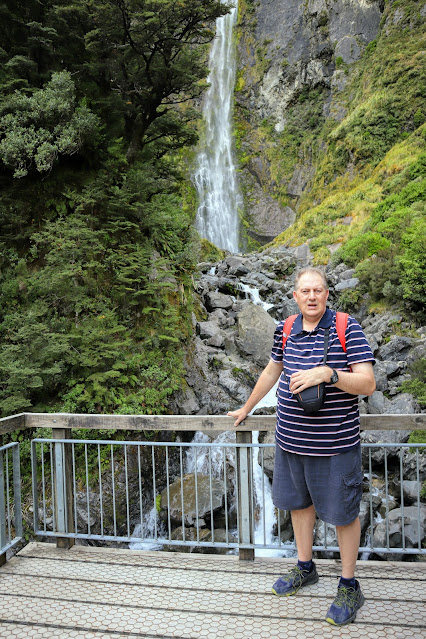
Self portrait at Punchbowl Falls in March

I thought I would have a quick look at my camera gear after this new purchase. 

My old camera gear:

Up until the last year I have been using a succession of cheap point and shoot cameras I have been buying off Trade Me. The quality of the images from any digital camera made after 2015 are good enough to post on the blog and I was happy to use a simpler camera when tramping. 

Two of the previous cameras I have used

For the most part I have been using various models of the popular Canon Powershot camera which can be had for anywhere from $40-$100 dollars second hand. They are still excellent cameras and if you want something better than a phone camera this is a good start point. 

An older Canon SX170IS digital camera

This was fine when I only needed photos for my blog but once I started my NZ Bush Adventures channel on You Tube I needed to up date my equipment. The main problem is that older digital cameras will only film in 720p HD which is not high enough quality for good You Tube production. 

The number relates to the number of pixels...720p is fine for photos but the standard for video is now 1080, 2820 or 4 K. Filming in Fine High Definition (FHD) means clearer, sharper video with better color saturation. 

My Canon SX410 would only film in 720p HD

I have been unable to find a second hand camera that was cheap enough and also took at least 1080 FHD film and photos. After much research I decided I needed to bite the bullet and invest in some brand new photo equipment to drag me into the second decade of the 21st century.

Canon M50 Mark II:

My new camera is a Canon M50 Mark II. This is a mirrorless camera with interchangeable lenses and the ability to add other photography equipment like tripods, microphones, lights, filters and lens hoods. This camera is in the style of a DSLR but on a smaller scale...lighter, more compact but with the features of a full frame camera. 

Canon M50 Mark II mirrorless camera


I have upgraded so that the quality of both my photos and videos are better. The new camera allows me to make use of a range of specific lenses suited to different conditions and particular subjects. It is also able to film in 1080 FHD and 4 K so the quality of the films are a lot better...sharper, greater focus and color corrected.

Canon M50 Mark II...view of the top controls

The M50 is one of the more commonly used cameras for vlogging as it has many of the ideal features to make it good at this role. In particular the ability to film in 4 K, the flip screen, image stabilization, touch screen, ability to change lenses and plug for a exterior microphone. I'm still coming to terms with using it as I am not a photographer (yet) but the potential is obvious. 


Ancillary camera equipment:

While the M50 is fine right out of the box a few ancillary items will make it more useful and easier to use. I am slowly acquiring all of the equipment I need to make the best use of the camera and this will be an ongoing task as photography gear is heinously expensive here in New Zealand. I will look at a couple of items I have already brought....


Camera Bag:

I purchased a new Lowe camera bag to hold some of the gear I need to have to make the most of the camera. The one I brought is large enough to hold the camera itself, a couple of extra batteries and some SD cards. 

My LowePro camera bag

The bag has one large pocket for the camera and several smaller one for other gear and fits on the hip belt of both of my main tramping packs. 

Microphone:

One of the features of the Canon M50 is a port for an exterior microphone...a vital part of a vlogging rig. Some commentators believe that the audio is more important than the film itself so a good quality microphone is a vital piece of equipment. 

My Boya microphone kit

I brought a Boya microphone off Trade Me for a very acceptable price...it is a Cardioid type with a fluffy wind sock to cut wind noise. 

Boya Cardioid microphone model BY-MM1

I have used it on several of my vlog posts and it will eventually become a piece of gear I always carry with me. 


Filters/hoods:

Filters are basically like sunglasses for your camera and help deal with intense sunlight which might over expose your photos. There are a variety of types and a range of companies making filters for any size and type of lens. I brought a set of filters for the M50 from a company called K&F Concepts...available through Trade Me.

Various filters: Carry wallet, UV, variable ND and solid ND

The set included a UV filter to enhance photographs of water, a variable filter with the ability to decrease/increase the darkness level and a solid dark filter for extreme sunlight. I also have a lens hood for the camera to stop sunlight flares off the lens.

Various caps for camera and spare lenses

Additionally I have a series of lens caps to protect the fragile contact points on my kit lens and my EF 35-80 lens. 

EF to EF-M lens Adaptor:

An EF to EF-M adaptor allows you to use full frame lenses on a mirrorless camera thus gaining some of the advantages of using the larger lens. I have an older DSLR with a couple of EF lenses so buying this adaptor meant I could make use of the existing lenses I already had.


A Canon EF to EF-M lens adapter

There are a lot of second hand EF lenses on the market as they have been the Canon standard for the last 20 years so I will gradually acquire some new or second hand lenses to enhance my photography kit. 


Spare batteries:

You only get the one camera battery with the M50 kit so I have purchased three additional off brand batteries for the M50. I also purchased a USB type battery charger so I can re charge them from my power bank in the field.  

My USB charger and spare batteries

With the kit battery and three spares I should have enough battery power for 4-5 days without recharge. 

My camera gear list:


Here is a complete list of the equipment I have for the camera at this stage. 

Canon M50 Mark II, with 14-45 EF-M kit lens*
Canon EF to EF-M lens adaptor (allows me to use EF lenses on a EF-M camera)
Canon 35-80 EF lens (I already owned this lens from a previous DSLR camera)

...a Canon 35-80 EF lens I already owned....


Canon lens hood (49mm)*

LowePro Camera Bag

K&F Filter set (49mm) (MCUV/ND adaptive/Polarizing filter)

Boya Cardioid microphone set*

4X LH12E batteries* plus a USB type charger

You will need cleaning tools for your camera

I usually just carry the camera, kit lens and microphone (*) on my tramps...the other equipment I take as and when required. I could use a portrait lens (fixed 50mm) and a 12-22 EF lens for my vlogs but they will require time to acquire as a decent lens is from $400-$900 in New Zealand. 


A selection of example photos...

I have been using the camera for a couple of weeks now and have included a couple of photographs to give you an idea of the images I can capture with this camera. The greatest increase has been on my vlogs so have a look at my You Tube channel to see the change in quality. 

Otamahua/Quail Island from Gilpins Track

Lyttleton Harbor and Mt Herbert

A photo taken up the Otira Valley on the M50

A photo taken up the Otira Valley on the M50

North face of Mt Rolleston from Bealey Valley

South Island Robin

South Island Robin

Bealey River from the bridge near the village

I am slowly learning about digital photography but you can already see that using a quality camera can bring improvement to my blog images and vlogs.