My three most used backpacks...
I am a bit of a gear collector and have quite a good selection of outdoor equipment to take on my adventures around the country. While your basic gear load may be the same each trip I believe that individual trips will require some specific gear for a safe and comfortable experience. Items like food, packs, sleeping bags, tents and clothing will vary with the conditions you expect to face.
 |
| My standard day trip load... |
I have multiple tents, cookers, sleeping bags and packs which I tailor to a particular trip. When it comes to packs I currently own five decent packs with sizes ranging from 40 liters right up to 75 liters. This gives me the ability to choose a backpack that will best fit the type of trip I am planning.
 |
| Rainbow Reach on the Kepler Track...Atmos AG 50 |
What I find though is that I keep using three main bags as between them one or the other will fulfill every need I may have. The three packs are the Vaude Brenta 40, the Osprey Atmos 50 AG and the Osprey Volt 75.
Vaude Brenta 40l:
Used for: Day trips, overnight trips:
I am a big fan of Vaude products and I currently own three Vaude backpacks ranging in size from 40 liters to 65+10 liters. Vaude is a well regarded German outdoor equipment manufacturer and their tents, sleeping bags and packs are some of the best in the world.
 |
| I also own a Vaude Astra 65+10 pack.... |
 |
| ...and a Vaude Brenta 50l pack... |
I have one of their lighter backpacks which I use for short overnight trips and as my day tramping bag. This is the Brenta 40l pack and it has all of the features of its bigger 65 and 75 liter cousins. It is really a bit big for day trips unless I need to haul a lot of warm gear, ice axes or crampons.
 |
| Vaude Brenta 40l pack is also red |
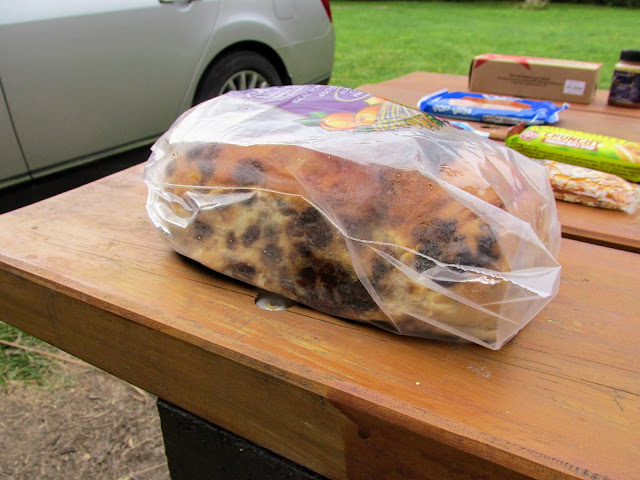
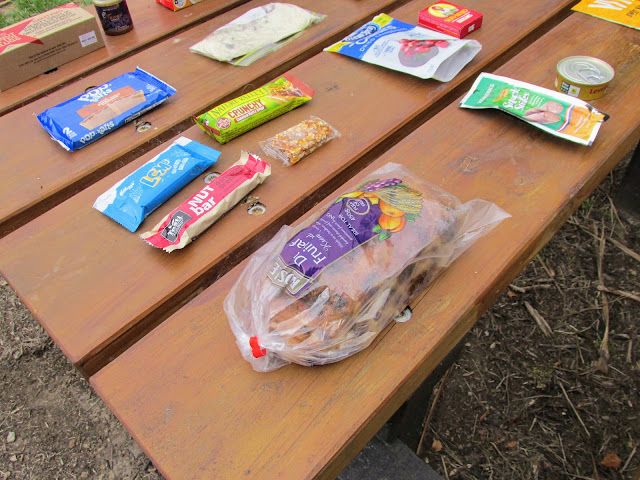
Here is what I usually carry in the Brenta 40 for a typical day trip...clothing, safety equipment, wet weather gear and water. Added to this would be food for the day including some snacks, lunch and drink powders.
 |
| My Vaude Brenta 40 with a typical day trip load |
I have been using the Brenta 40 for four years now and it is an excellent pack. It has a really good harness system and provided you don't overload it it is comfortable for many hours. Ventilation is excellent and it is tough enough to take a few knocks without compromising its structure.
The Brenta has an integral rain-cover contained in a small pocket on the bottom of the tent although I always carry my gear in a plastic bag to stop water ingress. No pack is totally waterproof despite what outdoor companies tell you and it is awful to need warm dry clothing and open your bag to find it is all soaking wet.
 |
| Atop Mt Herbert in 2021 on a windy day |
 |
| Break time on the Bealey Valley Track... |
 |
| Heading for Packhorse Hut with the Brenta |
 |
| Lunchtime at Bushline Hut, Nelson Lakes NP |
I am happy to give the Brenta 40l eight out of ten stars...
It is a stylish, comfortable and well thought out pack and a pleasure to use. After four years of use it still looks good and I do not anticipate any problems with it in the near future. You are certain to see it on my adventures for some time to come.
Osprey Atmos 50 AG:
Used for: Overnight trips to bookable huts, Great Walks, Te Araroa Trail sections
Beside Vaude the other pack brand I favor is Osprey from the United States. Osprey have an excellent name among the outdoor community for high quality gear with a lot of thought going into the set up, materials and technology they use. They are a weight conscious brand and they have probably the best range of lite weight packs on the market bar specific UL manufacturers like ULA, Gossamer Gear & Hyperlite etc.
 |
| An array of Osprey packs in an outdoor store |
A lot of my multiday tramping trips over the last 2-3 years have been to bookable huts, remote huts or Great Walk huts. The thing with all three categories of hut is that you are either guaranteed or highly likely to have a bunk for the night. This means you don't have to carry any camping equipment with you saving weight and space.
 |
| ...guaranteed bunk for the night on the Great walks... |
If you do not need to pack a tent, mat and ground sheet in your pack you can get by with a smaller pack. This is the main reason I brought a Osprey Atmos 50 AG pack. This pack is more than big enough to carry 3-5 days of equipment and I have used it exclusively on all of my Great Walk tramps from 2018 to the present.
 |
| Osprey Atmos 50 AG pack |
The primary use of my Osprey Atmos pack is for 2-3 night tramps where I will be staying in a hut. In a pinch I can carry my camping gear with this pack but it is a squeeze so I use my heavy life Volt 75 pack for those trips.
Here is a typical equipment load for one of these trips...this is without food:
 |
| Osprey Atmos with an overnight load...Great Walk or bookable huts |
Specifications for the Atmos 50 AG are as follows:
The Atmos 50 has become my 'go to' pack and I use it on around 60% of the tramps I am doing. I has gone to most corners of the South Island and Rakuira now but has yet to see any service in the North Island.
 |
| The Atmos hanging in Lakehead Hut in 2020 |
 |
| A map check stop in the Hawdon Valley.... |
 |
| Atmos 50 on the Rakuira Track back in 2019 |
The shoulder harnesses on Osprey packs are always good but it is spectacular on this pack. I have carried it for 7-8 hours before and my legs give out way before my back does. It is comfortable and has great ventilation across the back with their patented Anti Gravity system. The waist belt is fantastic and molds around your hips for exceptional weight carrying ability. I have recommended this pack to dozens of people over the last four odd years...
 |
| The Atmos is the most comfortable pack I own... |
 |
| Turkey Flat in the Waimakiriri Valley enroute from Carrington Hut |
The Atmos 50 AG gets nine stars out of ten from Jon...only nine because any pack would more or less need to carry itself to get ten stars!!!
I am going to be sad when this pack finally gives up the ghost as it has become a solid companion on many adventures. I almost want to buy another and store it away for later use that is how much I like this wee beast...
Osprey Volt 75:
Used for: Heavy loads...longer trips from 3-7 days, camping, Winter trips:
The third pack I would like to talk about is my Volt 75l pack which I purchased back in 2018 as a heavy load replacement for my Vaude Astra. The Volt is basically a big olde sack that I can fill with all the equipment I usually carry as well as a full set of camping gear. With a bigger load carrier all your gear can stay safe on the inside of your pack and not hanging precariously on the outside.
 |
| Osprey Volt 75l pack...heavy load carrier |
This is my gear load out with camping equipment included. This includes a tent, sleeping mat, ground sheet and sometimes a small tarp for more living space.
 |
| A full load...gear for a multiday or camping trip |
My Volt is the heavy load carrier amongst these packs...it is the one I use if I am carrying a multiday load of food and gear. It has plenty of internal space for my usual load of equipment plus space for a tent, sleeping mat and camping accessories if required.
Here are some specifications for the Volt 75l.....
This pack has not seen as much use as the other two...my style of trips over the last couple of years have heavily favored Great Walks, day walks and trips to bookable huts. I have used it most notably on my tramp of the Travers-Sabine Circuit and on the Casey-Binser Saddle trip. Now I have finished all the Great Walks I will be looking for more multiday trip ideas with the potential for camping.
 |
| The Volt 75l near Hallelujah Flat in Arthurs Pass NP (2020) |
The Volt 75 reminds me of Macpac packs I have seen...it is made from heavier duty materials and will last for a lifetime of tramping. New Zealand outdoor gear was traditionally built tough as we were very limited as to the gear you could get here. You brought a pack and expected it to last you a lifetime which some of them did. It is only over the last 20 years that overseas manufacturers have seen fit to sell their gear here in volume.
The Volt is WAY lighter than any Macpac pack...1.8 kg's as opposed to something like 2.2-2.6 kg. For comparison...the Macpac Torlese pictured above is similar to the Volt but weighs 2.4 kg. That is 600 gm's heavier for less carry space.
 |
| On Howard Saddle enroute to Sabine Hut (2018) |
I have found the Volt to be a really comfortable pack and it has just enough technology to make it competitive. Even with a heavy load you arrive at your destination at the end of the day feeling good. The pack has both excellent shoulder straps and waist belt and it can be adjusted to fit most medium to larger trampers.
 |
| The Volt 75 is an excellent heavy load carrier... |
My one complaint about the Volt is inadequate airflow across my back...you get a bit sweating carrying it. It is a solid form shaped harness so not much air can get to your back. In reality it is not that bad and certainly better than many other brands. I have just been spoiled by the harness setup on the Atmos 50 which is the best I have ever used.
 |
| Lakehead Track on the way to Kerr Bay in 2018 |
 |
| The Volt 75 is a rugged yet comfortable addition to my Gearshed... |
I would give the Volt75 seven stars out of ten.
I think it is a really awesome bit of kit and worth buying if you can find one. I will be using it for many years to come and my next outing with it will probably be a camping trip along the Abel Tasman Coast Track I am contemplating for later this year.
My other packs:
Vaude Brenta 50
Used for: Overnight trips to bookable huts, day walks in Winter:
Another excellent pack from Vaude this was my main day trip pack from 2014-2018 and filled the roll admirably. I have also used this on a couple of overnight tramps including to Carrington Hut, Packhorse Hut, Nina Hut, Lake Daniell and to Rod Donald Hut.
 |
| The Brenta 30 up the Otira Valley |
Karen used this pack on the Abel Tasman Track in 2019 and thought it was good even though it was a little too big for her. Georgia also used it when we went up to Packhorse Hut to act as hut wardens back in 2019.
 |
| Karen crossing Awaroa Inlet wearing the Brenta 50 |
 |
| Georgia's feet got hot so into the river she went... |
I still have this pack in my gear cupboards and will not dispose of it as it still has plenty of life left in it. I might use this for a short section hike in the Abel Tasman later this year although I now use the Atmos for those type of trips.
Vaude Astra 65+10
Used for: Heavy loads...longer trips from 3-7 days, camping, Winter trips:
This was the first new piece of equipment I brought when I started tramping again back in 2012. I brought a stash of new gear including a tent, sleeping bag and mat at that time and it was the start of my current gear shed. My choices at the time were dictated by my army gear and early tramping experiences before I knew anything about UL gear or lightening your load.
 |
| The Astra on the Casey-Binser Circuit back in 2012 |
The Astra was my main overnight tramping pack from 2012 right up to 2018 when I replaced it in use with the Atmos 50 and Volt 75. It went to many different areas of the South Island such as the Casey-Binser Circuit, Wharfedale Hut, St James Walkway, Queen Charlotte Track, Hawdon Hut, Te Ara Pataka and Fyffe Hut to name a few. It was the pack I used on my first new Great Walk on the Abel Tasman Coastal Track in 2016.
 |
| At the start of the St James Walkway in 2015 |
I am fond of this pack which is why I haven't sold it on Trade Me as it is a rugged, well designed bit of kit with some really good features. It is still my only 65 liter pack which is a good size for trips of 3-7 days. It also has an excellent harness with the ability to size to a persons torso. This means people other than myself can use it.
 |
| Up the East Hawdon Valley in 2015 |
The main reason it doesn't get used more is two fold. It is heavy...it started at 2.2 kg's but I managed to get the weigh down to 2 kg by removing some straps etc. The other reason is that I have been visiting a lot of bookable huts and Great Walks and it is too big for these type of trips.
 |
| Astra visits the Abel Tasman Coastal Track |
I may sell it or give it away at some stage but I will be sad when I do so...
Future acquisitions?
I am in the market for a suitable 30-35l pack for my day tramps as my current stable are all a little big for this purpose. Ideally I would love to buy either another Vaude or Osprey pack to fill this role but Vaude is not readily available anymore and the price of Osprey packs has rocketed since Covid hit.
 |
| The Osprey Talon 33 retails for NZD $299!!!!! |
Ideally I would like a Vaude Brenta 30...Vaude have a whole family of packs in the Brenta range from 25-55 liters and they all have the same harness system. This means you can dial up or down the sizes and they will all be just as comfortable.
 |
| The Vaude Brenta 30l pack |
I can buy one overseas but not here in New Zealand which bothers me but that's what its like living at the bottom of the world. I look at this size range every time I'm in an outdoor store but have yet to find one that suits my requirements.
The search goes on....