Saturday, 24 March 2018

West Sabine Hut to John Tait Hut: Nelson Lakes NP: 6-7 March 2018

...heading NOBO from West Sabine Hut to John Tait...

Earlier in the month I was up at Nelson Lakes National Park walking the Travers-Sabine Circuit. As part of this track I completed another mini section of the TA, the section of track from West Sabine Hut to John Tait Hut.


Jon on Travers Saddle


I was travelling NOBO at the time, but hopefully the photos included will give you a bit of an idea of the type of terrain you face while climbing over Travers Saddle (1783 metres) from either side.


West Sabine Hut to Upper Travers Hut via Travers Saddle

I was walking the Travers -Sabine Circuit in an Anti-clockwise direction, this equates as travelling NOBO on this section of the trail.

The swing bridge to West Sabine Hut over the Sabine River


West Sabine Hut, Nelson Lakes NP

As you can see West Sabine Hut is an older design but still completely serviceable, it is built in the older style ie all one big room with a central heating point. Given the huge number of people who visit, the hut is in excellent condition.


West Sabine Hut, Nelson Lakes NP: the bunks

Panoramic shot of inside of West Sabine Hut, Nelson Lakes NP
There is very little bench space in this hut much less than either Lakehead Hut of John Tait which are built to the same design. This was a problem later in the night when lots of people wanted to cook their dinner meal. 

The hut was busy....this is a 30 person hut and we only had 3-4 spare bunks by the end of the night...


West Sabine Hut, Nelson Lakes NP the small cooking bench

More bunks in West Sabine Hut, Nelson Lakes NP


West Sabine Hut to Upper Travers Hut via Travers Saddle

The next day dawned overcast but not wet so it was all go for a crossing of Travers Saddle. I knew i had a tough long day ahead of me climbing up and over Travers Saddle so I was out the door of West Sabine Hut and walking by 8.10am. 

The first part of the track was easy travel following the Sabine River down to the confluence with the East Sabine. After this it was constant uphill travel for the next 4.5 hours.


On the track to Travers Saddle from West Sabine Hut


Last view of the Sabine River, Travers Saddle Track


Map: West Sabine Hut to the East Sabine chasm

The first climb was only about 150 metres to gain the western side of the East Sabine Valley. Once on the top it was a gentle sidle for the next hour or so along the 850 a.s.l line to the bridge over the East Sabine.

Start of the climb to Travers Saddle, climbing to the 850 a.s.l line

Travers Saddle Track...there are root ladders

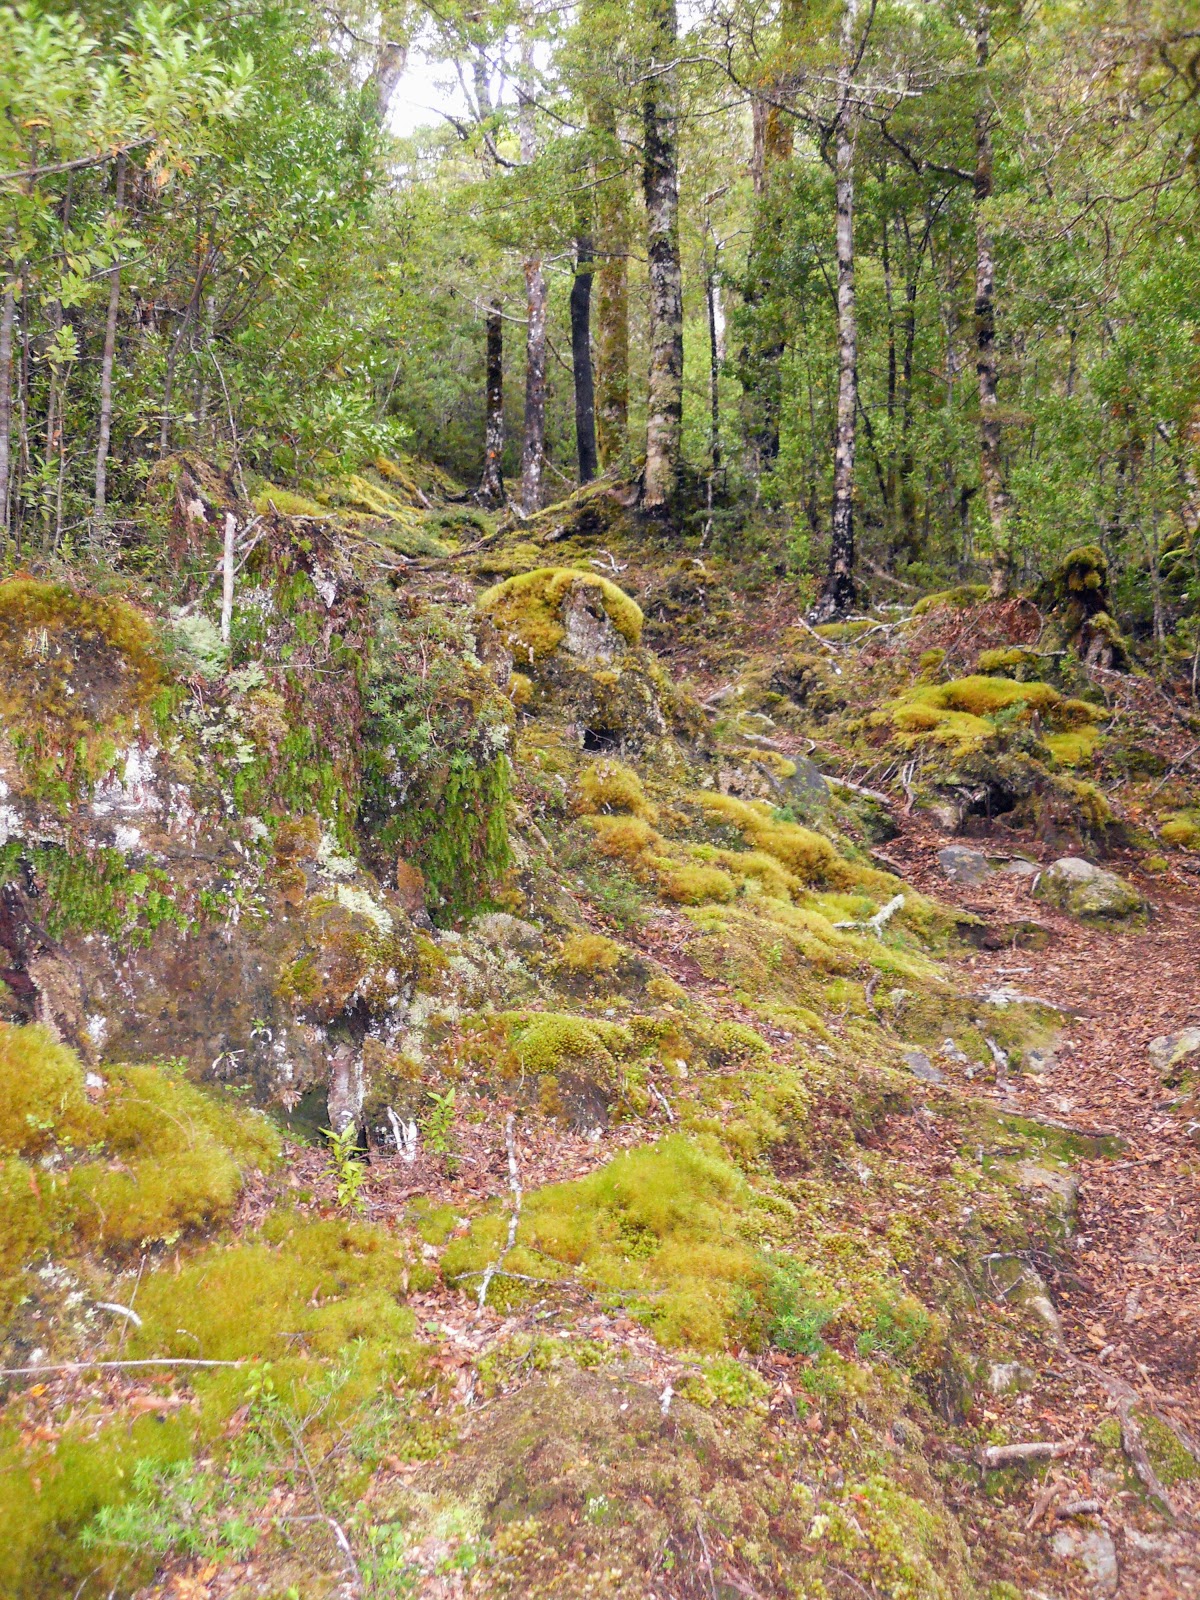
Travers Saddle Track....there is moss!


Travers Saddle Track...there is open forest sidling

Side stream on the Travers Saddle Track, you can drink this water!

The Sabine River constricts at the chasm to a gap of about three meters so it has gradually eaten its way down into the underlying rock. From the bridge the river would be about 40 meters below the level or the surrounding land.  


The bridge over the East Sabine Chasm, Travers Saddle Track

View down into the East Sabine Chasm, Travers Saddle Track

View down into the East Sabine Chasm, Travers Saddle Track


The East Sabine River from the Travers Saddle Track

About 10 minutes from the East Sabine bridge are a couple of side streams, these are the last water resupply points until you reach the other side of Travers Saddle so fill up here. You have a long hot climb ahead of you.


Side stream on the Travers Saddle Track...this is the last water resupply point for 3 hours!
The next section of track is up an unnamed stream bed for about 300 metres, after this you sidle off to the right to a new track up a spur. This track is not shown on the topo maps as it is only a year old. Its not a bad track but it is a constant uphill slog for at least 2-3 hours. 

It gradually gets steeper as it climbs to the bush line.

Starting the climb to Travers Saddle in a creek bed, Travers Saddle Track

Map: East Travers bridge to Travers Saddle...the new track shown in red!


Heading up through the beech forest, Travers Saddle Track

I accidentally snapped my trekking pole the previous day so I had to make an expedient one from a branch I found next to the track. Model I lasted all the way from Sabine Hut to the bridge literally 50 metres from Upper Travers Hut where it too snapped. 

What a bloody legend it was...I carefully placed it back on the forest floor with a heartfelt thanks to the forest.


Poles, trekking, wooden, expedient, Mark I

Thinning forest half way to Travers Saddle

The first view of the way I had come was about an hour into the climb up the spur, you can see the Mahanga Range on the other side of the valley but little else.


First view of the surrounding mountains on the Travers Saddle Track


Miniature beech trees...Travers Saddle Track


More open forest near the bushline, Travers Saddle Track

I spotted another pair of broken walking poles near here so it is obviously a common occurrence on this track. 


East Sabine Valley from the Travers Saddle Track

Looking towards the Mt Franklin from Travers Saddle Track


About to exit the bushline after 2 hours climbing, Travers Saddle Track

The bushline at 1500 metres, on the Travers Saddle Track

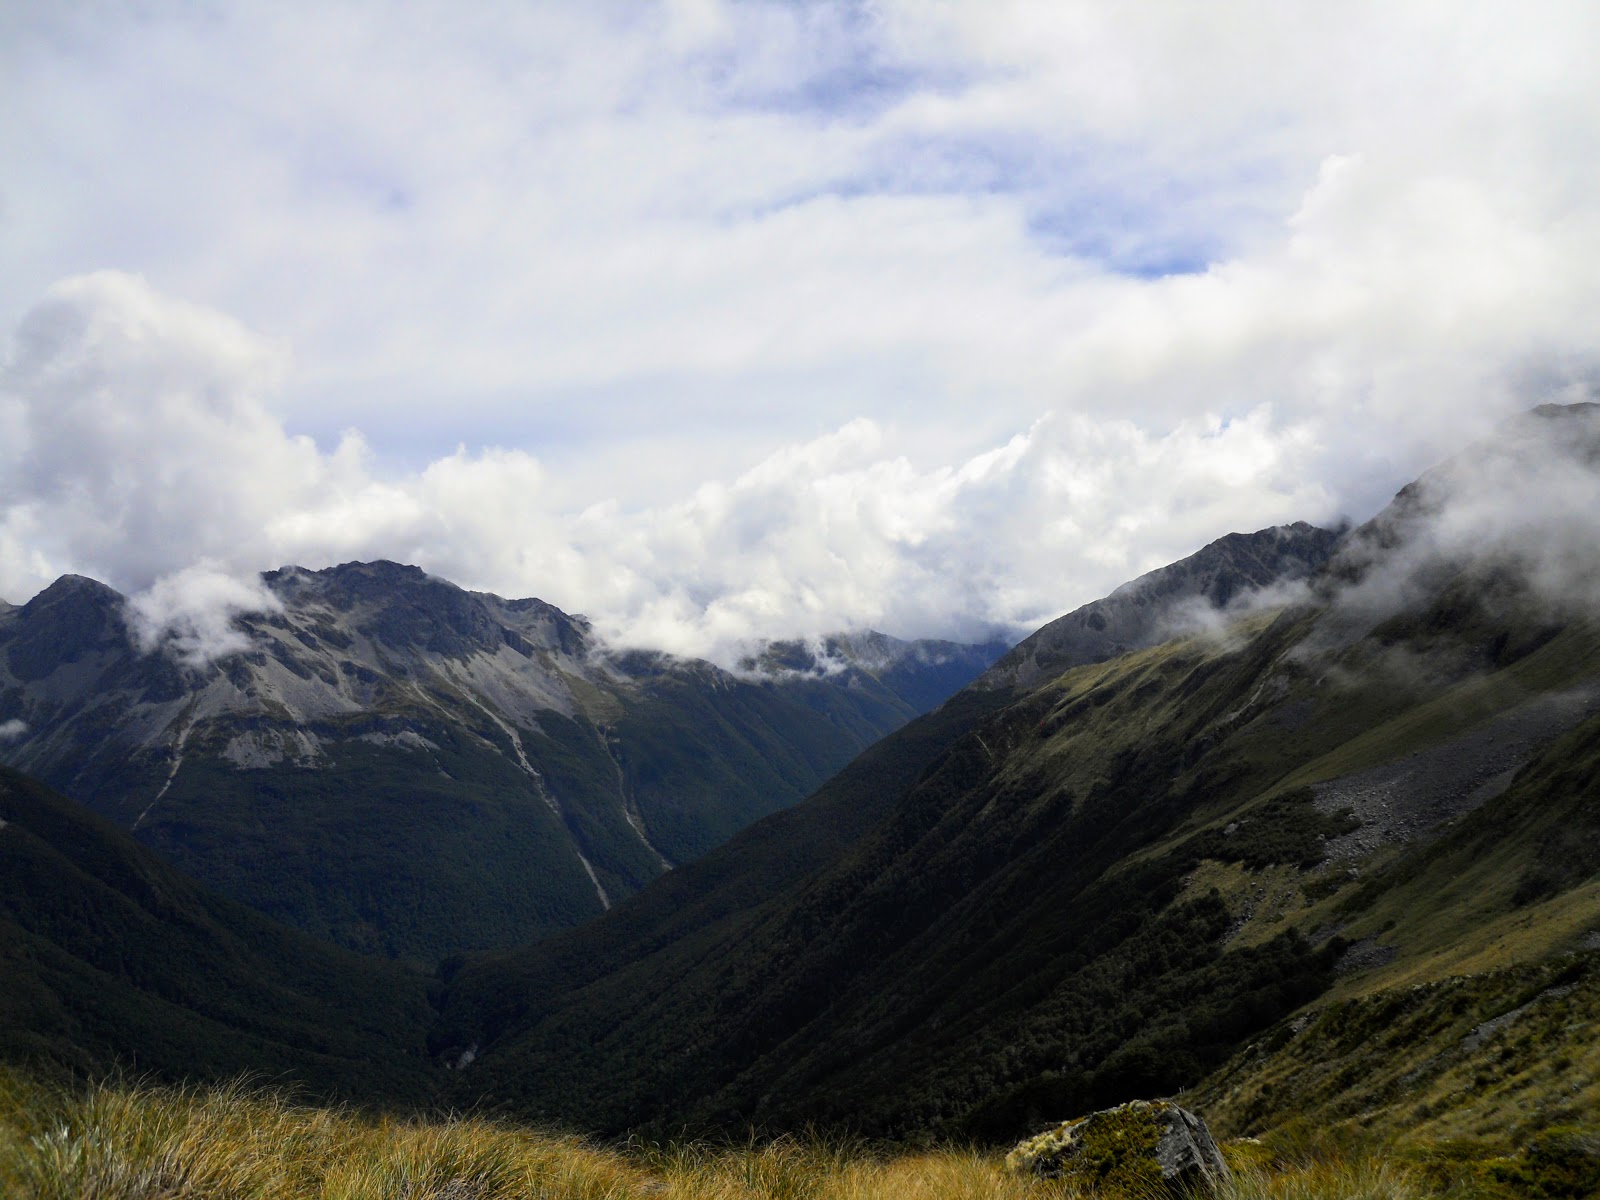
Once out of the bush the view was much better, you can see al the way down to the Sabine River as well as the peaks which surround you on all sides. In the photo below you climb over the slip at the end of the East Sabine Valley and sidle along the far side of the valley for an hour. Then it is climb, climb, climb!!!


View down into the East Sabine Valley, Travers Saddle Track

Cloud forming over the distant Mahanga Range, near Travers Saddle


A native Common Speargrass along the Travers Saddle Track

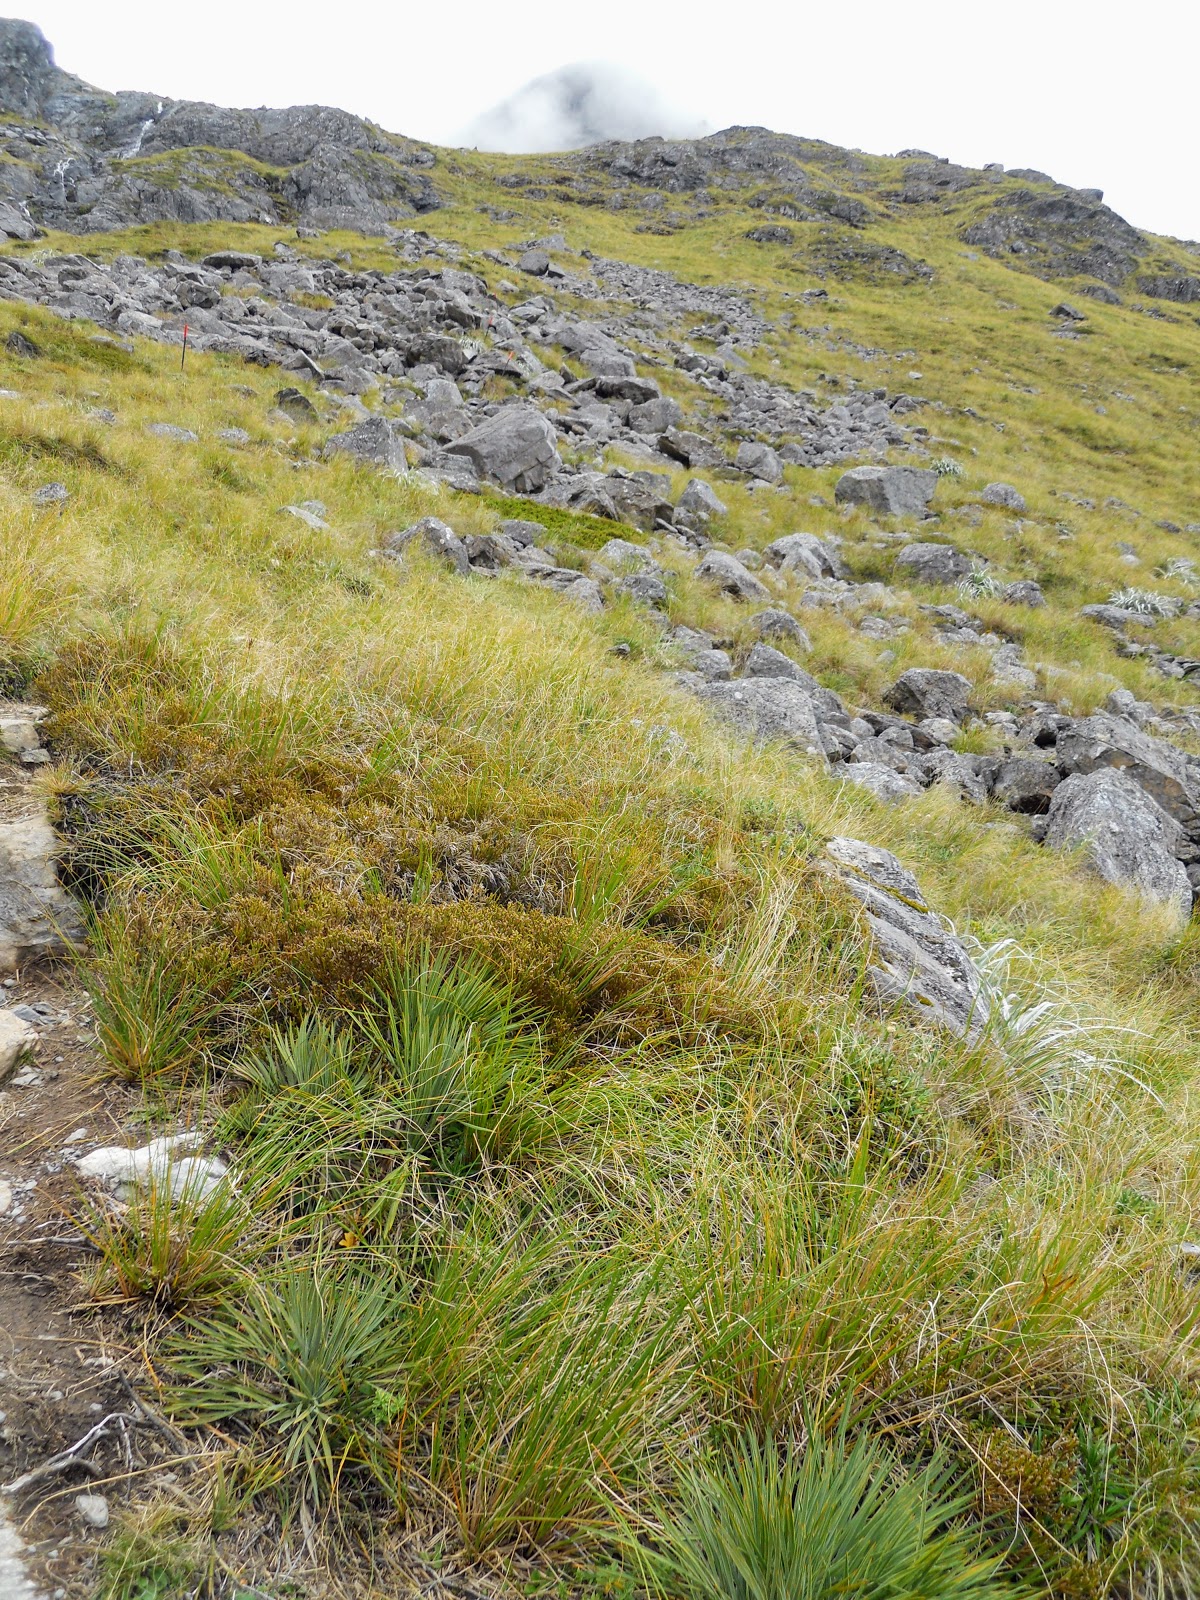
It takes about 45 minutes to climb from the bush-line to the saddle itself...it is steep and rocky going so a slow pace is required for safety. It is a mixture of tussock, rocks and shingle slides...the path is fairly obvious and it is also marked with snow poles.

Cloud rolls over the Travers Saddle Track from just short of the saddle


Take care here if it is cloudy...the cloud came down when I was half way to the saddle and I literally could not see 3 metres. There are a lot of fall hazards in the area so make sure of your footing.


In the tussock just short of Travers Saddle, more speargrass

There are lots of false crests if you walk up from East Sabine Valley...you have been warned!


Mt Travers from the last climb before Travers Saddle
I finally made it to the top of Travers Saddle after about 5 hours of tramping..it was slow going climbing up that long spur line. I stopped for about 10 minutes on top for a snack and some water and then continued walking. 

On a lovely sunny day I bet the saddle is spectacular, but on the cold, windy, cloudy day I had the saddle had a very foreboding feel to it. I didn't like being up there by myself at all, the first time I have ever felt like that tramping.

Spooky as hell!

I think it was because I was thinking about the German tramper Christian Prehn who vanished without a trace up there in 2014...I can totally see how you could walk in the wrong place and disappear never to be seen again.

I got going as soon as possible.....


Atop Travers Saddle with Mt Travers in the background


Jon on the top of Travers Saddle
Once I got to the saddle I thought it would be relatively easy to make my way down to the hut....I should have known better. It is steep, rocky and very broken terrain up here. It took me over 1 hour and 45 minutes to get down to the Upper Travers Hut.

It was really slow,  tough going....


Travers Saddle Track descending into Travers Valley

Mt Travers from the Travers Saddle Track

If you are desperate for water you could take some from the tarn pictured below but for gods sake filter it as it will be used by Red Deer and Chamois. Otherwise there is a small stream about 10 minutes further down the track which I used.


A alpine tarn on the descent to Travers Valley, Travers Saddle Track

Large historic rock slide on the flank of Mt Travers

Pt. 2096 from the Travers Saddle Track


Map: Travers Saddle to Upper Travers Hut


Large moss growing next to the Travers Saddle Track

There is a bit of precarious rock hopping involved in crossing the edge of the rock fall zone on the flank of Mt Travers.

Crossing the Mt Travers rock slide area, Travers Saddle Track


View down into the Upper Travers cirque, St Arnaud Range in distance

The last drop down to the Travers Valley floor is steep so take your time on the descent. The track helpfully zig zags down this slope but the track marking leaves a bit to be desired...

Route down to the valley floor in the Upper Travers Valley

Flowering Common Speargrass in the Upper Travers Valley

Hey SOBO's...the track to Travers Saddle is up this slope....


Upper Travers Valley, from the Travers Saddle Track

Once you make it down to the Valley floor the travel is a little easier although you are still about 30 minutes away from the hut. Watch the holes...the tussock covers up a multitude of ankle breaking holes through here.


Travers Saddle as viewed from the Upper Travers Valley

Upper Travers Hut is located in the first finger of bush you can see as you make your way down the Valley. It is a beautiful location with the surrounding mountains and alpine meadows around it. 


Travers Saddle Track descending to Upper Travers Hut
View of the Upper Travers Valey from the track to Travers Saddle


Footbridge over the Upper Travers River, Travers Saddle Track
I was very pleased to see Upper Travers Hut...I left West Sabine Hut at 8.10am that morning and arrived at Upper Travers at 3.30pm. That is over 7.5 hours of walking and I was looking forward to putting my feet up.

Upper Travers Hut, Nelson Lakes NP
There were only five people in the hut when I got there but as the afternoon wore on more and more people joined us. Mostly it was TA walkers, some NOBO but most of them heading south. A fine evening was spent with the fire going as I had cut up a goodly pile of firewood in the afternoon.

Upper Travers Hut to John Tait Hut


Upper Travers Hut is very nice...it is one of the newer huts on the Travers Sabine Circuit and remained warm even when it was cold outside. It is certainly a step up from West Sabine and John Tait Huts that is for sure. 

Plenty of space as well, the hut was quite busy with trampers but even though we had over 20 people in the hut it didn't seem to be that full.


Upper Travers Hut, Nelson Lakes NP: the cooking benches

The two bunk-rooms in Upper Travers Hut, Nelson Lakes NP

My pile of wood splits, Upper Travers Hut, Nelson Lakes NP

DOC sign, Upper Travers Hut, Nelson Lakes NP

View of Mt Travers from inside Upper Travers Hut, Nelson Lakes NP

Below is the only clear view I had of Mt Travers in the nearly 18 hours I spent at Upper Travers Hut. The top third of the mountain was constantly covered in misty cloud for all of the rest of the time, Mt Travers is obviously on the inversion line for cloud formation. 

I wouldn't want to be in this hut in a big earthquake, there is a LOT of loose 'weetbix' rock up there.....

Mt Travers from Upper Travers Hut, Nelson Lakes NP


Upper Travers Hut to John Tait Hut

Everyone was gone from the hut by 8am, I was the last to leave with two other people heading down valley while the rest headed off to climb over Travers Saddle. 

It was a short day for me, only 9 kms or three hours from the Upper Travers Valley to John Tait Hut. I took my time after the exertions of the previous day.


Starting out on the Upper Travers Track, from near Upper Travers Hut


Last view of Upper Travers Hut, Upper Travers Track

Upper Travers River, Upper Travers Track


Pole beech in the Upper Travers Valley

Upper Travers Valley one hour from the hut

There are three bridges to cross as the track meanders from side to side of the Valley in an attempt to avoid avalanche chutes. It is fairly pleasant walking, the track is well marked with plenty of obvious trail sign and there are bridges over all the major side-streams. 


Bridge number one, Upper Travers Track

Goblin forest on the Upper Travers Track


Mt Hopeless Massif from the Upper Travers Track
There are a couple of possible camp sites down in the valley, there are a series of river flats about half way between the huts with easy access to the river. I saw a threesome of happy looking hikers at breakfast at one of these spots.


Possible camp-site in the Upper Travers Valley

Bridge number two, Upper Travers Track


Back into the beech forest, Upper Travers Track

If you like waterfalls make sure you take the short 10 minute sidetrack to Travers Falls, they are not that high but have a goodly amount of water going over them.


Turn off to Travers Falls, Upper Travers Track

The open beech forest around Travers Falls

A mire or alpine bog, Upper Travers Track


River flat travel on the approach to John Tait Hut, Upper Travers Track

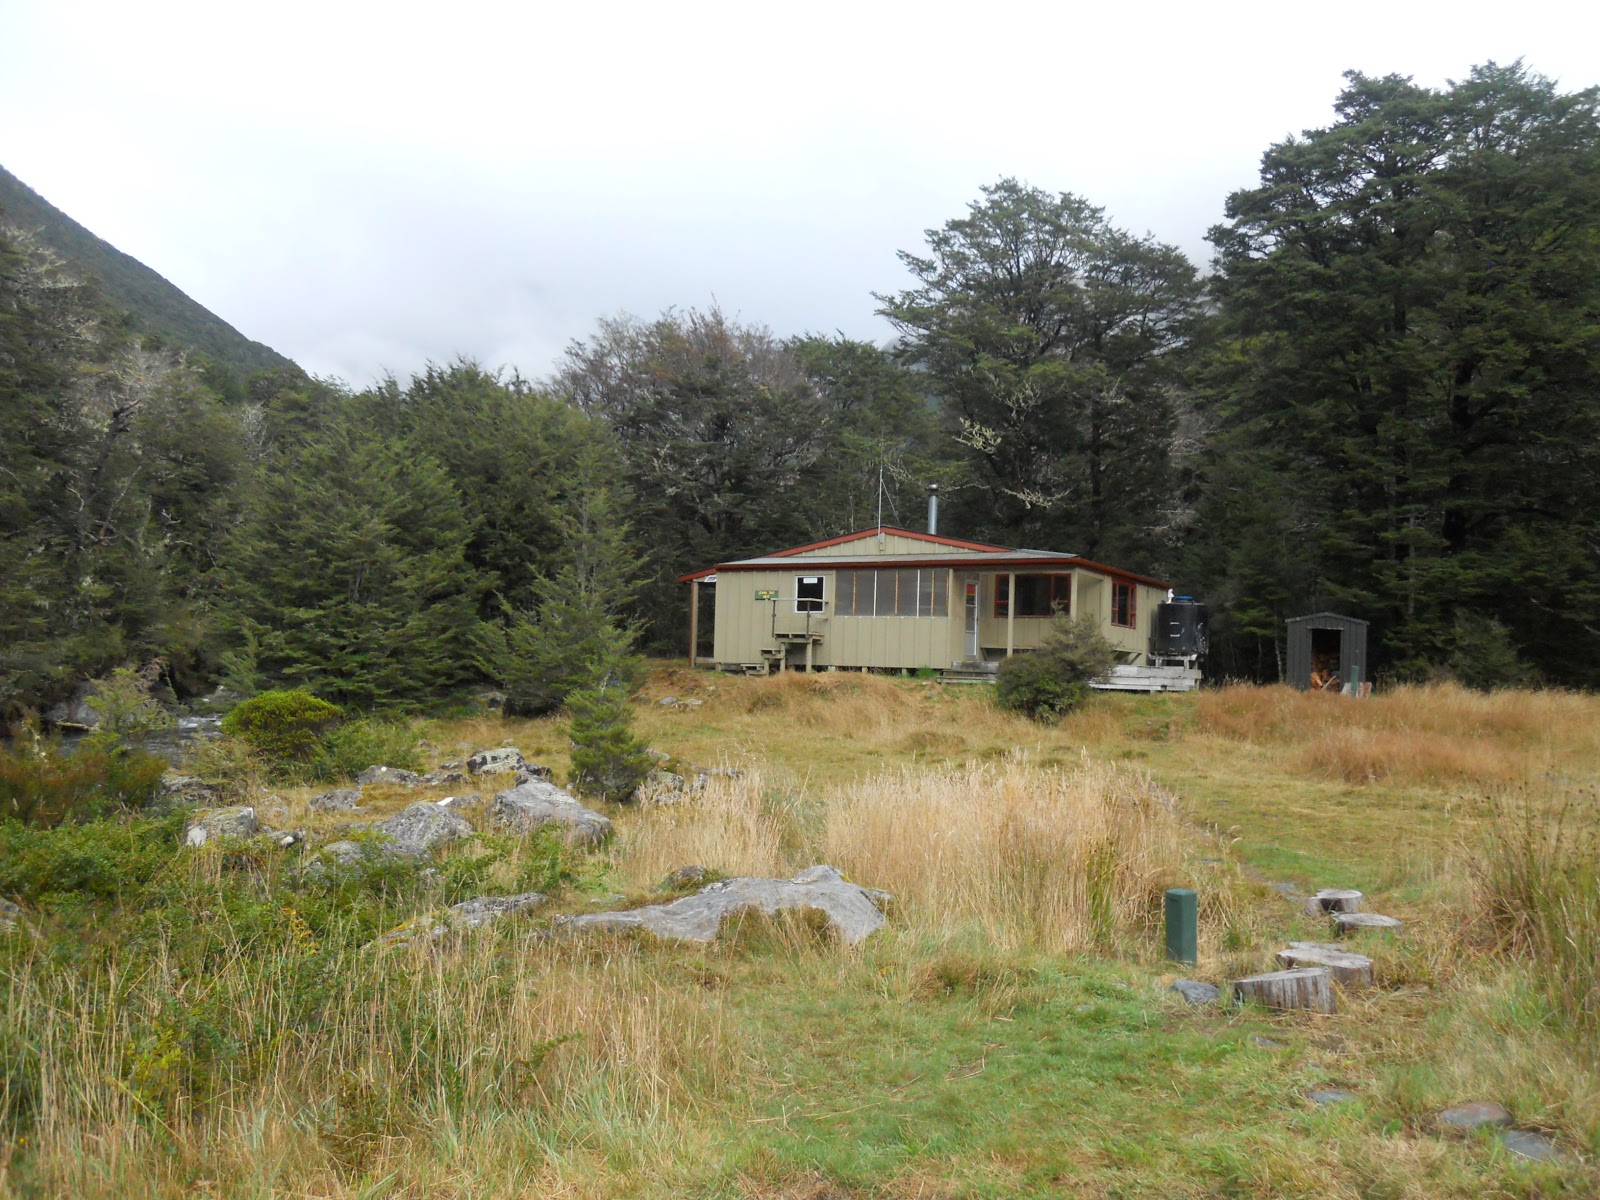
John Tait Hut is about 2.5-3.5 hours down the valley from Upper Travers Hut. It is one of the older huts on this track but still a great spot to stop. It was occupied by two dope smoking totally non communicative Frenchmen when I arrived but they soon packed up and headed for the Upper Travers Valley.


Avalanche advisory for John Tait Hut, 50 metres to go.....

Finally arrive at John Tait Hut, Upper Travers Track

So, I finally arrived at John Tait Hut after about 3 hours of walking. 

Just a point of interest, if you are walking the Te Araroa in the 2018/2019 season you will no longer be able to stay at John Tait Hut. The hut is due to be removed some time this year as it sits about 20 metres away from an avalanche chute and is regularly hit by avalanche debris during the winter. 


Avalanche debris field right next to John Tait Hut in 2017

John Tait Hut from the far side of the clearing it occupies

A new hut is due to be built somewhere between the Travers River swing-bridge and John Tait Hut, the exact location is still not decided...


Access: SOBO from St Arnaud via Lakehead Track and Travers Valley Track. NOBO from West Sabine Hut follow the Travers Saddle Track. 
Track Times: 10.5 km's or 6-9 hours West Sabine to Upper Travers Hut, 9 km's or 2.5-3 hours Upper Travers to John Tait Hut
Hut Details: West Sabine Hut: serviced, 30 bunks, wood burner, water tank, wood shed, toilets; Upper Travers Hut: 24 bunks, wood burner, water tank, wood shed, toilets; John Tait Hut: serviced,  27 bunks, wood burner, wood shed, toilets, water tank
Miscellaneous:The track over Travers Saddle is classed as a route only but is marked with snow-poles the whole way. High alpine pass, watch weather in region, some fall and rock fall hazards. Avalanche zone from May-November.


Tuesday, 20 March 2018

Resupply point: St Arnaud General Store: Nelson Lakes NP

Resupplying in St Arnaud, Nelson Lakes NP, South Island.....

One of the places you will need to resupply while on the trail is at the beginning/end of the Richmond Ranges and the start/finish of Nelson Lakes National Park.

This is at the settlement of St Arnaud on SH 63 close to Lake Rotoiti.

Entering St Arnaud from the Blenheim end of SH63, general store on the right


St Arnaud is located between the Richmond's and Nelson Lakes National Park. It is roughly 7-10 days in both directions to the next resupply point. If you decide to forgo a drop box, then your only resupply option here is the St Arnaud General Store. 


St Arnaud near Nelson Lakes National Park

The St Arnauld General Store

St Arnaud is a small settlement on SH 63 half way between Murchison and Blenheim. There are less than 50 permanent residents but it is often busy as it is the gateway to Nelson Lakes National Park. 


The St Arnaud General Store, cafe and petrol station

There is only one store in St Arnaud, the General Store on the main highway through the settlement. Calling this a store is a misnomer as it is basically a small grocery selection attached to the local NPD petrol station.  

The St Arnauld General Store


 The grocery selection is limited but you can certainly buy enough supplies here to get you through to either Hanmer (off the trail) or Arthur's Pass (with a drop box at the Boyle Outdoor Education Centre). 

I heard that the price were expensive, but a quick peruse of the shelves showed that they were only marginally more expensive than in a larger town. 


St Arnauld General Store: chiller and bread selection

The cafe attached to the store has a decent selection of cakes, slices, pies and sandwiches/rolls which can provide you with treats and lunches for the first day at least. They also do coffee and light meals if that is something you are interested in. 


St Arnaud General Store: the inside of the store

The store had methylated spirits (denatured alcohol) and a limited selection of screw type gas canisters for sale. There were very few of them so it might be best to contact them before you arrive to see if they have any available. 

St Arnaud General Store: toiletries and hardware

All the usual suspects are present: bread, rice, noodles, pasta meals, mashed potatoes, soup, canned tuna, cereals, nuttela, peanut butter, dried fruit, crackers, milk and milk powder, sugar, tea/coffee etc. etc. They have a limited supply of pre-packaged meats in a chiller including ham, bacon and salami.

I didn't spot any freeze dried meals, tortillas/wraps or anything similar in the shop.

St Arnaud General Store: general food groceries

The store also sells alcohol: they have wine, beer, RTD's and a selection of spirits for you to choose from. As always you need to be 18 years old to buy alcohol in New Zealand. 

The St Arnaud General Store sells alcohol....

I love that they have my favourite beer Kronenbourg (Vitamin K) in stock..must be all the tourists from France/Germany who drive the demand...


RTD and beer selection at the St Arnaud General Store...Kronenbourg!!!!

There is a small selection of fresh fruit and vegetables, enough to restock for the next section of the trail. I saw apples, oranges, bananas, onions, corn cobs, potatoes, garlic, capsicum, carrots, parsnips and tomatoes. 

Fruit and vegetable chiller at the St Arnauld General Store

So...not a supermarket but at least a possible resupply option as you pas through.

Incidentally, if you are catching the Nelson Lakes Shuttle to the Mt Robert car park (if doing the side trip to Angelus Hut) the shuttle collects you from the kiosk in front of the General Store. Bookings are essential and best made several days before your day of travel. 


Wednesday, 26 July 2017

Choosing a cook stove for the Te Araroa: a discussion

Equipment for Back-country Cookery

 There are a variety of ways to heat water and cook food while in the New Zealand back-country. The most obvious is the use of an open fire. Unfortunately the negative environmental impact of fire has discredited this as a food preparation method.

Camp-fire cooking...as old as humankind.
Instead there are a myriad variety of stoves and heating methods specifically manufactured for outdoor use. I thought it might be useful to look at these various types and explain what I use on trail and why.

  So many types of outdoor cooker...

To start let us look at the types of cookers available. Note that the terms stove and cooker are interchangeable, you call them stoves we call them cookers!

 Iso-butane or gas cannister stoves

The most commonly used stoves are those using iso-butane cannisters, these are often refereed to as 'gas stoves'.  A gas stove will consist of the gas 'bottle' and a screw on cooker unit which you attach to it. If it is very cold the gas can freeze making the cooker useless. Please note that the older 'pierced' type of gas cannister is very difficult to find in New Zealand, we all use screw on cookers.

Kovea Titanium Stove

There are two main types of gas cooker, those that attach to the top of the bottle and those that are free standing. Above is a Kovea Titanium cooker, this is typical of the top attaching varieties. As you can see it has a perforated burner head, with a control mechanism on the side to control the gas flow. There are fold out pot supports above the burner head and a piezo spark actuator to light it with.

My top fitted Kovea gas cannister stove in use at Packhorse Hut, 2016

Below is the MSR Whisperlite, this is one of the free standing variety of outdoor cookers. These are much more stable as they usually have wider legs/pot supports arms and have a lower centre of gravity. The downside is the extra weight, these are normally 100-200 gms heavier than a top fixing stove.

MSR Windpro free standing gas stove

Here is a different version of a cannister stove, the Jetboil. A Jetboil is an 'integrated cooking system' with stand, cook pot, burner and cannister all in one.  You use a Jetboil to heat water...you cannot really cook in these. These stoves are good for Alpinists as they are fast, difficult to blow out and pack into quite a small package. Stoves similar to this are also made by MSR, Primus and Kovea.

It is a pretty good system, I see lots of TA trekkers using them. Unfortunately, a Jetboil can be  expensive and also heavy which is probably why more people don't use them.


The Jetboil 'cooking system'


 Iso-butane gas cannisters are highly pressurised so the cannisters must be made of steel to contain the pressure. This means the cannisters are heavy. An empty 225ml cannister weighs 145gms so that is a lot of wasted weight you have to lug around.

Disposing of empty cannisters is problematic. The empty cannisters cannot be recycled unless they are punctured- they need a hole in them to allow any residual gas to escape. If not completely empty they are liable to explode during the recycling process.

Various sizes of iso-butane gas: 100gms, 225 gms and 550 gms

Gas cannisters are expensive in New Zealand as most of them are imported. They currently cost around $10 NZ dollars for a small cannister, $15-20 for a medium and $15-25 for a large.

Pros:Easy to use, fast heating ability, relatively cheap, moderate heat control, widely available, many different models/makes, three sizes of cannister available in New Zealand

Cons:Fuel cannisters are heavy, quite expensive, disposal of empty cannisters is problematic, top fixing versions are unstable, not good in high altitude or cold conditions

Multi-fuel stoves

As the name implies a multi-fuel stove can use a variety of different fuels, these range from iso-butane cannisters, white spirits, kerosene and even gasoline. Some will only use liquid fuels while others are able to use both liquid and gas.

The MSR Whisperlite multi fuel stove, fuel bottle and gas cannister shown
To use a multi fuel stove you fill the fuel bottle with your fuel of choice. You then turn this into a pressurised gas by pumping the pressure handle. The fuel is then lit with a match, lighter or piezo spark actuator.

Multi-fuel stoves are excellent for Alpine conditions as the fuel is not affected by altitude or cold. Their ability to use a multitude of fuels also makes them practical: gasoline is available everywhere in the world while gas cannisters are sometimes difficult to locate.

These stoves tend to be a lot heavier, 300-800 gms as opposed to a gas cannister stove at 70-200 gms. They can also be a cast iron bitch to light as it is sometimes hard to get the pressurisation right. The burner units are also prone to soot blockages. You must use good quality fuel and regularly clean the cooker to ensure optimum performance.


A MSR multi-fuel cooker service kit


I have to say though, there is nothing like the sound of a multi fuel stove blasting away on a cold morning...to a lot of us older Kiwi trampers it is the sound of tramping itself.


Pros: Can use many different fuels, much hotter flame, better flame/heat control, work well at altitude and in cold conditions, sound awesome when fired up

Cons: Much heavier, more difficult to operate, fuel must be pre warmed and pressurised before use, can be hard to light, more prone to stove blockages

  Methylated - Spirit stoves

  Methylated or spirit stoves have been around for a long time but are undergoing a resurgence of interest in recent times. These can be commercially produced or home-made and consist of a burner unit with a series of holes in the top and sides. Once lit the flame will come out of these holes providing the cooking heat

 
A Trangia brand alcohol/meth's stove in action...

As you can see in the photo below they are quite effective looking but have a number of limitations. The heat put out by methylated spirits is low, so cooking times are much longer. Once lit the flame cannot really be controlled so these are not ideal for simmering meals. They are also easily extinguished by wind- you need a wind shield if using a spirit cooker outside.


Home-made meths stoves made from aluminium cans

These stoves will use both methylated spirits and de natured alcohol, which is the American name for a similar product. "Meth's" comes in 1 litre bottles in New Zealand and cost from $6-$10 NZ dollars. Methylated spirits can be found in most service stations, hardware stores and supermarkets.

 De natured alcohol is usually only found in the larger outdoor equipment shops. It costs approximately $10-$20 NZ Dollars per 1 litre bottle.  


Methylated Spirits aka Denatured Alcohol
 
Pros: Fuel is cheap and widely available, stoves tend to be quite light, stoves cheap if homemade

Cons: Not totally safe for use in huts, easily extinguished by the wind, often need a wind shield and stand for use, care needed when refilling, fuel only comes in 1 litre bottles so there is potential wastage if you want less than this.

Solid fuel tablets- Esbit Stoves

  Solid fuel stoves have been a mainstay of military forces worldwide for most of the 20th century. There are many firms producing both stoves and fuel including Sea and Summit, Coleman, MSR, Coghlans and cheap 'no brand' versions from China.

The most reknown brand of solid fuel stoves are made by the German company Esbit, so in Europe these cookers are called 'Esbit stoves'.

Classic Esbit stove from Germany
 The solid fuel tablets for an Esbit type stove are made of a compound called hexamide. Hexamide is  highly inflammable and relatively easy to light. It is basically a solid form of hydro carbon covered in wax to stop it evaporating. One if its downsides are the fumes it exudes: these are both poisonous and foul smelling. 


Classic Esbit fuel cubes

The beauty of solid fuel is that you need no stove...when I was in the military we just used a couple of rocks or sticks to prop our mess tins above the burning fuel cubes. My god... the smell of a 'hexie' tablet cooking some 'Spaghetti and Sausages' 'Corned Beef Hash' or 'Meat and Vegetables' is something I still remember with fondness...

An Esbit stove is bullet proof: it has no moving parts, requires no servicing and can be stored forever. That's why the military loved them.

An Esbit stove doing its thing...

Pros:No parts to break, can be stored till the end of time, need no cooker, slow steady heat, relatively light, can be lit when wet, fuel makes excellent fire starter so dual purpose, cheap (a stove and fuel is usually less that $10 NZ dollars.

Cons: Low heat output, noxious fumes, cannot be used indoors, not readily available except in outdoor stores, easily extinguished by wind, best used for heating water.

Portable wood stoves

 One of the newer forms of stove are those that use wood as their fuel...much as our ancestors have done for the last 40 000 years. These are commonly aluminium or titanium and burn paper, sticks, leaves and small wood chips. 

There are many commercial versions but these can also be made by the outdoor hobbyist at home.
 These are most often used by survivalists, long trail hikers and in areas where other stove types are banned. I see very few people using them in New Zealand- it is wet here so no dry wood and there are often fire bans in place over summer.
Typical lightweight wood stove in action
Pros: No need to carry fuel, relatively lightweight, inexpensive if home-made, can be used in most outdoor situations, fold down versions take up little space, environmental impact slight


Cons: They require dry wood,  can get very sooty on the outside, fire risk- cannot be used if there is a fire ban, cannot be used in huts, bulky unless fold down design, commercial versions are expensive

Flameless ration heaters or FRH's

Flameless Ration Heaters or FRH's are a by-product of military style Meals Ready To Eat (MRE's).

US military FRH from a Meals Ready to Eat (MRE)


Flameless Ration Heater: the chemical heater pad in a FRH


An MRE (...semi jokingly called Meals Rarely Eaten...) is a thermo stabilised retort pouch of food. The complete meal also includes various drinks, snacks and side dishes. They are a one meal item i.e. you would need to eat three a day. The FRH they contain uses a thermo-chemical reaction to warm the main meals and any hot drinks. Most of the military forces of the world are now using these.

A US military MRE: Beef Pasta with Tomato Sauce

FRH's were specific to military circles until about 10 years ago when a number of outdoor companies started to produce them for hikers and campers. Backcountry Cuisine are the only indigenous manufacturer of FRH's, they are $15 each in New Zealand. 


A Back Country Cuisine Flameless Ration Heater

The New Zealand commercial food ranges these can be used with are Kaweka Meals (also used by the NZ Defence Forces) and the MTR range of Indian meals. Freeze dried meals can also be heated if the contents are rehydrated with cold water first. 

Pros: Very lightweight (less than 20 gms each), simple to use, you require no stove/fuel/pot if not heating water for hot drinks, can be used in tents with adequate ventilation, not effected by weather (rain, wind, cold)

Cons: Horrible environmental impact, very slow heating, expensive, limited uses- only good with thermo stabilised retort pouches, hard to source in New Zealand, need salt and a cup of water to work

 No heat-no cook tramping 

One way to deal with cooking while trekking the Te Araroa is to simply go without. I have meet a number of people practising no cook (or stoveless) tramping. Instead of your traditional hot meal they eat foods that require no cooking.

These might include cereals, dried meats/cheeses, jerky, bread, tortillas, crackers, spreads, power bars, nuts/dried fruit or it could be dehydrated meals reconstituted with cold water.

Basically the sort of stuff you usually eat for lunch!

Some no-cook menu items: cereals, scroggin, energy bars, tuna, salami, drink powders, dried fruit etc.
I've tried this on an over night tramp and it is not for me, I like a hot drink in the morning and soup and a hot meal at night. In extremis I would go stove-less but not out of choice. That's just my personal opinion by the way...you do what works for you!

I meet a guy at Anne Hut a couple of years ago who had scroggin (trail mix), tea bags and 24 peanut butter sandwiches for food. His menu was scroggin for breakfast and two sandwiches for lunch/dinner. Hey...it would keep you going, but....

Do you fancy this at every meal for four days....

Pros: Lightweight (no stove/pot/fuel/cutlery), cheaper option as not buying fuel, easy to sustain yourself for short periods this way, relatively wide menu choices available even in New Zealand

Cons: 24 peanut butter sandwiches......who wants to eat that for 6 days in a row! Will not sustain you properly for more than a couple of weeks, could be unsafe if tramping in adverse weather conditions (...hot drinks save hypothermic trampers...this is an olde tramping truism...), packaging...there would be a lot of it!


My main tramping stove

 I am a big fan of canister stoves and I’m not alone – the overwhelming majority of trampers I come across use them. For price point, ease of use and efficiency they are hard to bet. Therefore my primary cook stove for the TA is a gas fed Fire Maple titanium stove. 

In early 2018 I brought myself a lighter titanium stove, it is a Chinese brand called Fire Maple, the code for it is the FMS-116T. It has survived a multitude of outings now and I am impressed...it works really well. It only weighs 48gms (76 gms in the supplied carry case). It is super efficient and has a wide burner head and cost me $50 from the online retailer Gearshop.

This is my main stove now.

My new Firemaple FMS-116Ti stove

 Why gas I hear you say....? 

I just find it more convenient to use a cannister stove. You can have it out and going in less than 1 minute. A good breakfast is a fast breakfast if you know what I mean! Any other type of cooker involves too much buggering around to get it operational.


Fixing dinner with my Kovea stove at Mid Robinson Hut, 2015

If you are going to be using a cannister stove you need a CrunchIt. A Crunchit is basically a big can opener which allows you to puncture cannisters to vent residual gas.  A CrunchIt weighs a mere 45gms and is available on-line and at many outdoor stores. Once punctured the canister can be recycled with other metal. 

The Jetboil Crunchit recycling tool

I carry two Esbit cubes with me as an emergency backup on every trip. As I said earlier these can be used without a stove and because they only weigh 5 gms each are a useful survival tool.


My Esbit cubes: firestarter and emergency cook tool

I have an Esbit methylated spirits cooker which I will be using on the longer Te Araroa Trail sections. The fuel is cheaper and more readily available in out of the way places, making it ideal for that kind of tramping.

My Esbit cooker looks like this...

Let us now have a look at some other outdoor stoves I own...


A gallery of other stoves I own...

I bought a new outdoor stove a couple of months ago (March 2023) ...it is the Soto Windmaster. I have read some good things about this stove and felt the need for some retail therapy so...! It weighs about 100 gm's with the supplied canvas bag and is super efficient on gas...I can boil 1 liter of water in less than 3 minutes. It also has an integrated piezo ignitor which my other stoves do not. 


Soto Windmaster fixed to a medium sized gas cannister

BTW: this is my tenth outdoor stove...I think I might have a problem! 


My oldest stove is a Kovea Backpacker gas cannister stove. I purchased this back when I was in the New Zealand Army. Most of us had started using canister stoves rather than solid fuel tablets to cook and heat water. I have been using this light weight stove since 1992 and it is still going strong.


The Kovea Backpacker stove

The cooker weighs 110 gm's which is a bit heavy but I really like it. I usually couple this stove with a medium size MSR cannister. This combination allows me to boil water for both breakfast and dinner for 5-6 days on one cannister. The stove cools fast and has a larger diameter burner head which I find advantageous when cooking.

My Kovea Backpacker stove in use at Nina Hut in 2016
 
I inherited a Kovea Hiker stove from one of my brothers who moved to the US, it is an older design but still works well. She is a bit hefty for long trail trekking but folds up small into a nifty hard plastic container.

Kovea Hiker stove, mine does not have a piezo

I also have an Outer Limits Huntsman stove, which I brought when I got back into tramping in 2010. For a free standing cooker it is light at only 150gms. I really like this stove but I just have a sentimental attachment to my Kovea Backpacker so this one doesn't get used very often.


An Outer Limits Huntsman free standing stove


I hope that gives you some ideas to consider when considering what stove to use on the TA.