Tuesday, 21 March 2017

Tramping skills for the TA: River Crossings

The New Zealand disease...

I have seen some posts online recently from TA trekkers which slightly disturb me. It seems that some people do not take the dangerous nature of our rivers seriously enough.

In Colonial times drowning was referred to as "the New Zealand disease" because so many people died trying to cross rivers etc. It is hardly surprising given the number of beaches, lakes, rivers and streams in this country. Drowning remains a major cause of fatalities amongst visitors and kiwi trampers to this day.

The Waimakariri River., number one of five channels. Beautiful but also dangerous....


Because of our profusion of water in New Zealand you need to be able to assess a body of water and have the skill and experience to pick safe crossing points.

Here are some tips I have learnt over the years about what to look for when you approach a water body and how to decide how, when and where you will cross.

Me contemplating a crossing of the Otira River, shall I cross here....


...or shall I cross here?

 To cross or not to cross?


The most fundamental question you need to ask yourself is Do I need to cross this? This seems obvious yet I'm sure some people have never even asked themselves this question. As soon as you enter a river you can potentially get into trouble so if a crossing is unnecessary just don't cross!

If there is any possible way to avoid entering a river etc. you should take advantage of it. Is there a bridge nearby you could use, can you reach your location without crossing water and is there an alternate route totally avoiding rivers are all questions you should ask yourself.

Nice...can be crossed easily at this point!


Every river crossing is dangerous: regardless of the amount of aids, training and experience you have. Even veterans with 40+ years of experience have been swept away by rivers so never assume you are immune. Take every crossing seriously.

Crossable with care as part of a group (Why...there is a bridge 100 meters up-river)


As the Mountain Safety Council (MSC) say... "If there are any doubts about the safety of crossing, don't cross - it isn't worth the risk"

Cross these rivers? Don't even think about it!

Approaching a river


Develop your own process for assessing rivers, streams and creeks when you are out tramping. If you have a mindful process you are much more likely to use it every time you arrive at a water body.

How, where and when will I cross...?


Always stop and assess any body of water- never jump in without stopping and formulation a plan to get you safely to the other side. I will often stop for a drink or snack at a river crossing point. This means I am rested before attempting to cross and gives me time to really eye up the river I'm thinking of crossing.

Brew up before a river crossing...


Never attempt to cross a river that is swollen, discoloured, with no visible sight of the river bed or if there are debris floating in it. These are all signs of a dangerous river.


A discoloured Alfred River...

If you approach a river and hear a low rumbling do not cross. the water is moving rocks along the stream bed, these can easily injure you.

Look for a safe place to both enter and exit the river. Avoid steep or undercut banks, shingle banks, debris piles and areas with dense vegetation as these will be difficult places to negotiate.
Don't cross here...too many debris to negotiate...


Be careful of marked fords- rivers are changeable beasts and what was once easy going may now be a certain death trap. An example is the ford over the mouth of the Travers River in Nelson Lakes NP. The ford is marked by DOC orange triangles, yet if you follow the path you are led straight into a swift waist deep channel.

The Travers River ford- deep channel near far bank!


If you go 30 meters downriver it is only knee deep right across the river. It is always worth the effort to explore alternate crossing point before you commit.

The MSC have more information about assessing possible river crossing points on their website.

Cross as a group or solo?

You can cross a river by yourself or as a member of a group. The MSC do not recommend crossing a river solo. A single person does not have as much stability as two or more people. A group is heavier and has more points of contact with the bed of the water course. Both weight and contact are vital to maintain traction in swift water.

Even two trampers crossing together makes your chances of success so much greater.

Obviously there will be times when you must cross rivers by yourself but you should do everything in your power to avoid doing so.

Group crossing


If you are part of a group you should cross using the mutual support method.

Using the mutual support method


Follow these rules when using the mutual support method:

  • Choose a crossing leader before entering the water. They control the crossing- all group members listen close for instructions.
  • Choosing a crossing point is a group decision- discuss your options.
  • Strongest person to be at upstream end of group
  • Upstream person slightly forward of next, you want a shallow incline to the group
  • Second strongest person at downstream end of group
  • Hands grasp neighbours pack-straps/clothing/belt around the back of their body
  • Group should be parallel to the flow of water, this will minimise the force of the water
  • Maximum river depth no more than thigh deep. The only exception would be in very slow moving waist deep water. If it is deeper than the thigh DO NOT CROSS regardless of the group size!
  • Take small shuffling steps all the way across the water.
  • The group moves as one unit- all the way across.
  • Don't fight the river flow- conserve energy! Move diagonally downstream with the flow of the water.Take this into account when scouting an exit spot on the far bank.
  • Pack straps loosened and sternum strap undone
  • Can be used by 2-5 people, if more than 5 then you need a second group
  • Suitable for even and uneven river beds, your neighbours stop you falling into too deep of a hole.
  • Always wear footwear as rivers can be slippery.

Nicely done- group using the mutual support method

Crossing solo

If you must cross solo use the solo supported method. Grab a pole at least your height, use this as an extra leg to give you more stability. Shuffle your way across the river maintaining two points of contact at all times.

Solo supported using a pole...
...and in deeper water!


You should really angle this pole across your body with the upstream end planted on the bed of the river.


Solo supported method, pole anchored on river-bed

Walking poles can be used in ankle to knee deep water but are not long enough for anything over knee depth.

Crossing using trekking poles for support


If you have the option of crossing as a group or solo ALWAYS cross using the group method.

General river crossing technique:


Take care to remember these points when crossing any body of water:

Having decided on your crossing point make sure all gear is secured inside your pack. Loose items on the exterior can be lost or drag you under once waterlogged.

No! Stow that shite inside your pack...!

Undo any sternum straps and loosen but do not remove your waist belt. Sternum straps are a possible choking hazard as the buoyancy of your pack can force them up towards your neck. The waist belt will help with stability if you fall into the water.

Sternum straps as a choking hazard...


Avoid wearing loose clothing that could gather weight from the water. Remove it and stow it until you reach the other side. I'm thinking about fleece trousers and wet weather pants here. Obviously you don't have to cross buck nekkid, shorts or tight trousers will be fine

Always wear your footwear. Rivers can be slippery and they also conceal sharp rocks etc. on their beds. I know you like dry boots but safety comes first.

Wet feet but safely across the river!


Dont skip from stone to stone or walk along logs. You are far more likely to end up in the river doing this and may injure yourself. I have seen numerous people take a full immersion bath just because they wanted to keep their boots dry.

Bad crossing technique: don't do this...


...don't do this...


...and absolutely do not do this!


Use a plastic pack liner or water proof dry bag to keep your pack contents dry. Make sure you will still have dry warm clothing and a sleeping bag for the end of the day.

Standard MSC pack liner bag

Pack showing my plastic pack liner

What if I fall mid stream?


Good question. Every tramper is going to experience the buttock clenching shock of going adrift in a river at some time, I certainly have.

In 1998 I was part of an Army group crossing a swollen river in the Kaimaniwa Range. Three of us got swept downstream for about half a kilometre. I am not ashamed to say it frightened the be-Jesus out of me as I am not a good swimmer at the best of times. We were lucky and all managed to reach the river banks but not everyone has such luck.

If you do fall use your packs natural buoyancy to keep you afloat. Get onto your back, face downstream and use you arms in a sculling motion to work your way to the river side.

Sculling to safety after a river mishap, photo from MSC website


Once there carefully remove your pack and slowly work both it and yourself up the bank to safety.

If you do not have a waist belt or it is undone use the older MSC advice as it is equally effective:

Pushing straps to stabilise pack


Lean back on pack and face downstream
Push down on the bottom of your pack straps to keep your pack on your back
Keep your legs in a running position and head diagonally towards the bank
Remove pack only if you lose control of it/or it pushes you under. In that case grasp it to your chest and use it as a pack float instead.

Once you are safely out of the water you need to get dry and warm as quickly as possible. Hypothermia is a real risk after a total immersion on even the warmest, sunny day. If required you should stop, erect some shelter, get into your sleeping bag and get some warm food/drinks into you. If you are part of a group you can also light a fire to warm you and dry out clothing.

Regrouping and drying off after river crossing

For more information on river crossing technique see the MSC website.

Practice makes perfect, but....!


Even with mastery of crossing methods and a lifetime of experience people still have problems from time to time. Learning about rivers and how to cross them really is a lifelong learning experience. Hey, I have been tramping for over 25 years and I am still learning new things every time I cross a river.

The best advice I can give you is to take a NOOA, NOLS or MSC sponsored river safety course. These will teach you the basic skills you need to survive in rivers. This knowledge will be enhanced with the experience you gain every time you cross another body of water.


Be safe out there!


Sunday, 8 January 2017

Pimp that meal: Adding extra taste to your freeze dried experience

How to pimp a freeze dried meal

 Most "Dirt Bag" long trail hikers exist on fairly dodgy food: soup powder, cous cous, rice, powdered potato, nuts and ramen noodles. This works but man does it get boring fast!


Tasty Ramen - good on day one....not so much on day 81!


   Using freeze dried meals is another option open to you - the problem, while light and convenient, these meals can be lacking in taste.  With a few choice additions you can make any freeze dried meal into food worth savouring.

Freezer bag or freeze dried?


When I am tramping I generally carry two types of dinner meal. The first is the home-made "freezer bag" type which I make from store brought ingredients. These consist of a carbohydrate with the addition of vegetables, protein, herbs and spices.

A selection of dehydrated freezer bag meals


Generally these require some "in pot" cooking time although it is possible to make meals that simply require hot water. I eat them straight from the bag or the pot. Ihese are great but they are also heavier and often more difficult to prepare at meal time.

I will be covering the preparation of these in a separate post.


 The second meal type is the ubiquitous freeze dried (FD) meal: you just add hot water and then wait for the meal to re hydrate.
 
The advantage of freeze dry meals is their low relative weight (less than 200gms) and the ease of preparation which negates a whole lot of mess and bother at the end of a long day. Unfortunately, they can be costly and sometimes lack taste. 
A selection from the Backcountry Cuisine range

I'm a kiwi section hiker so my typical breakdown would be two home-made to one freeze dried meal. If the section was 5 days or more, when food weight becomes more of a factor, freeze dried meals will dominate.

Bagging up four days worth of tramping food


Buy in New Zealand or bring with you?


In New Zealand the two main freeze dried ranges are supplied by Backcountry Cuisine and the Outdoor Gourmet Company. These are available at outdoor stores and some supermarkets. 

Both companies produce a wide range of 1 and 2 serve meals including breakfast, lunch and dinner items. People will often tell you these rival products are different, i.e. one is better than the other, but in reality I cannot tell them apart.


Backcountry Cuisine Meal

The Outdoor Gourmet Company meal

Of course, you could just purchase some freeze dried meals and bring them with you. There will be a company in your country which produces freeze dried meals, check your local camping/outdoor stores. If you want to ship them to New Zealand you should check with the Ministry of Primary Industries (MPI) first to if they are allowed here.

Adding extra taste to your freeze dried meal


 I'm sure most of us have tasted a freeze dried meal before, they are OK but not what you would call 5 star cuisine. The solution: add ingredients to "pump up" that taste!

Jon at Mid Robinson Hut, 2015, with pimped freeze dried meal in hand

Obviously, anything you add to this type of meal needs to be pre cooked, dried and or freeze dried as well. The idea is to add items that will increase the flavour of your meal while still minimising weight and size.  

Salt, pepper, herbs and spices

 Freeze dried meals have a high salt content but given the amount of sweat you expend tramping adding a touch of salt to improve taste is acceptable. Taste your freeze dried  first as some are much saltier than others.

 Pepper is a great addition to any meal and adds a complex depth of flavour. I generally carry the small sachets of salt and pepper from take out restaurants, one of each per day used sparingly.

Salt n' Pepper alright!

A touch of dried curry powder, oregano, mint, coriander, chilli or your herb or spice of choice can add a blast of flavour to any meal.  Adding a good Tex-Mex mixture will maximise the taste of chilli and re fried bean meals.

Spice rack at the local supermarket...go mad!


I carry some small resealable bags with a selection of herbs and spices to add at meal time or you can staple your chosen mix in a small bag to the outside of the freeze dried bag.

Why not make a "spice tin" like the one in the photo below, less than 50 gms and a whole lot of added taste...

Small spice tin of a US hiker-


Remember weight is important and a little goes a long way with spices; dont go overboard.

Sauce it!

There are a bewildering array of sauces on the market that you can utilise, here are a few I have used:

 Tomato ketchup/sauce/HP is probably the most obvious type, a small takeaway sachet added to dehydrated tomato dishes will maximise the tomato flavour. I use the McDonald's packets because you always get a fist full of them with your McD's meal and never use them.  

Tomato paste sachets can also be used but the flavour is a lot stronger.

Good old Mickey D's ketchup!


Tabasco hot sauce will give your meal a hefty kick, it is especially good in stews and casseroles adding complexity to the taste as well as heat. I have a supply of miniature Tabasco bottles brought from an Asian food market but you can decant your hot sauce of choice into a lightweight plastic container.

Miniature Tabasco bottle

Soya Sauce is great with any Asian, rice or fish dish, I use the small "fish" shaped serves you get with sushi, again I found a supply of these in a local Asian food market.

Single use Soya "fish"

Worcestershire: I have taken to decanting Worcestershire sauce into a small plastic bottle as I find it adds great taste depth to any venison, beef or lamb meal. Worcestershire is a piquant fish based sauce with a hint of spice and a warm mouth fill, beautiful with all meat dishes.


Worcestershire Sauce

Muoc Nam or fish sauce is a salty additive which is vital in any South Asian recipe. Again it is best with Asian inspired meals but can be used in a wide range of situations for example to give Bolgnaise an unusual fusion taste, or to add another flavour level to stews and casseroles. 

Fish sauce I use

Don't spill this in your pack, my gawd it stinks, and it will stay there for years! 


Nuts & dried fruit

 Adding a handful of your nut of choice can add a nice crunch to any Asian, pasta or rice dish, including risotto. The nut flavour also brings out the inherent nutty taste of rice. I personally favour peanuts, cashews and almonds but any nut can be used.

A selection of nuts

A handful of dried fruit is a traditional essential in any North African inspired meal including tagines, lamb cassoulets and any cous cous based meal. Think raisins, sultanas, dates, dried apricots....


My homemade Moorish style cous cous salad with feta, raisins
  

Craisins (dried cranberries) will go well with any Venison or Chicken meal, they add an interesting sweet-sour note.

Ocean Spray craisins

Vegetables

 There is no reason you can not add vegetables to your freeze dried meal including your choice of fresh ones. There are a variety of dried and freeze dried vegetables commercially available which can be added to any meal. 

BCC make a freeze dried vegetable mix (as well as rice/potato/beef mince/cheese and egg) which can be added straight to any freeze dried meal. I know that Backpackers Pantry and Mountain House make similar products in the US.


A quick search of your local supermarket will yield dried onion/shallots, mushrooms, garlic, capsicum, peas, beans, olives and sun dried tomatoes. All of these, properly re hydrated, can be added to freeze dried meals. 

Dried Shiitake Mushrooms

Don't forget fresh vegetables; a diced clove of garlic, some sliced ginger,  diced onion or capsicum, freshly sliced mushrooms, carrots and celery can all add a touch of class to your meal.


Preparing vegetables for the dehydrator


Onions and garlic will last a long time in your pack. Do not go overboard with the fresh vegetables as the fresh varieties are heavy.

Extra protein

 If you want to add extra protein to a freeze dried meal then go ahead. The downside is that adding any form of protein that is not dried will add considerably to the weight of that that meal. Personally I I usually find freeze dried meals have more than enough protein already.

Jack Links Jerky is a good source of protein

Good sources include cheese, tuna or other oily fish, smoked meats (salami/jerky/bacon) and canned chicken and shredded ham. If you are going to use cheese a hard one such as Parmesan, Pecorino, Romano or aged Cheddar is best (they last longer) or some form of shelf stable processed cheese.

Olive oil

Long distance "through hikers" in the US and Europe swear by olive oil: they add it too everything. Olive oil is a rich source of fats and anti oxidants as well as tasting delicious.

A local brand of Olive Oil

 A tablespoon of oil added to a freeze dry can make that meal more unctuous as fat is one of the elements the freeze drying process removes.Carry it in a well secured small plastic bottle stored in an outside pocket as it will make a real mess if spilled inside your pack.

Milk powder

Milk powder will add to the creamy nature of many freeze dried meals, anything with a cheese or cream based sauce will benefit.

Full cream Anchor milk powder


Coconut cream powder is especially good for those who are Lactose intolerant as well as going well with Asian style meals. Make sure you add enough water to reconstitute the powder correctly.


A coconut milk powder available in New Zealand


What about crackers/potato chips?

If you are the kind of tramper who eats crackers/chips for lunch and you have some spare, break them up and add them to your dinner meal.

Leave some for dinner...

 Most if not all of these meals are soupy or stew like so anything that adds a crunchy texture is appreciated.

A note on serving size

Some people are happy to use the single serve meals, personally I find this is too small a portion for me. I always buy the two person serves as I find them more filling especially after a long hard day. You will need to decide which is best for you, a two serve will add an extra 50-75 gms to the weight.

Back Country meal sizes: 2 serve meal on left, 1 serve on right


Here is a breakdown of serving sizes:

Meal: Cottage Pie
Serving size                                        1                                              2
Net weight                                         90gm                                     175gms
Preparation                                        Add 250ml water                  Add 500ml water
Serving size (Reconstituted)             335gm                                   640gm                  


Alternately you can "bulk up" your single serve with some extra freeze dried rice, cous cous, tabbouleh or 2-3 dessert spoons of dehydrated potato flakes. Make sure you add extra water to allow these to hydrate fully.

What about some practical examples?

Here a couple of practical examples of how this works using meals from both Back Country Cuisine and the Outdoor Gourmet Company product lines.I have made all of these additions in the past.


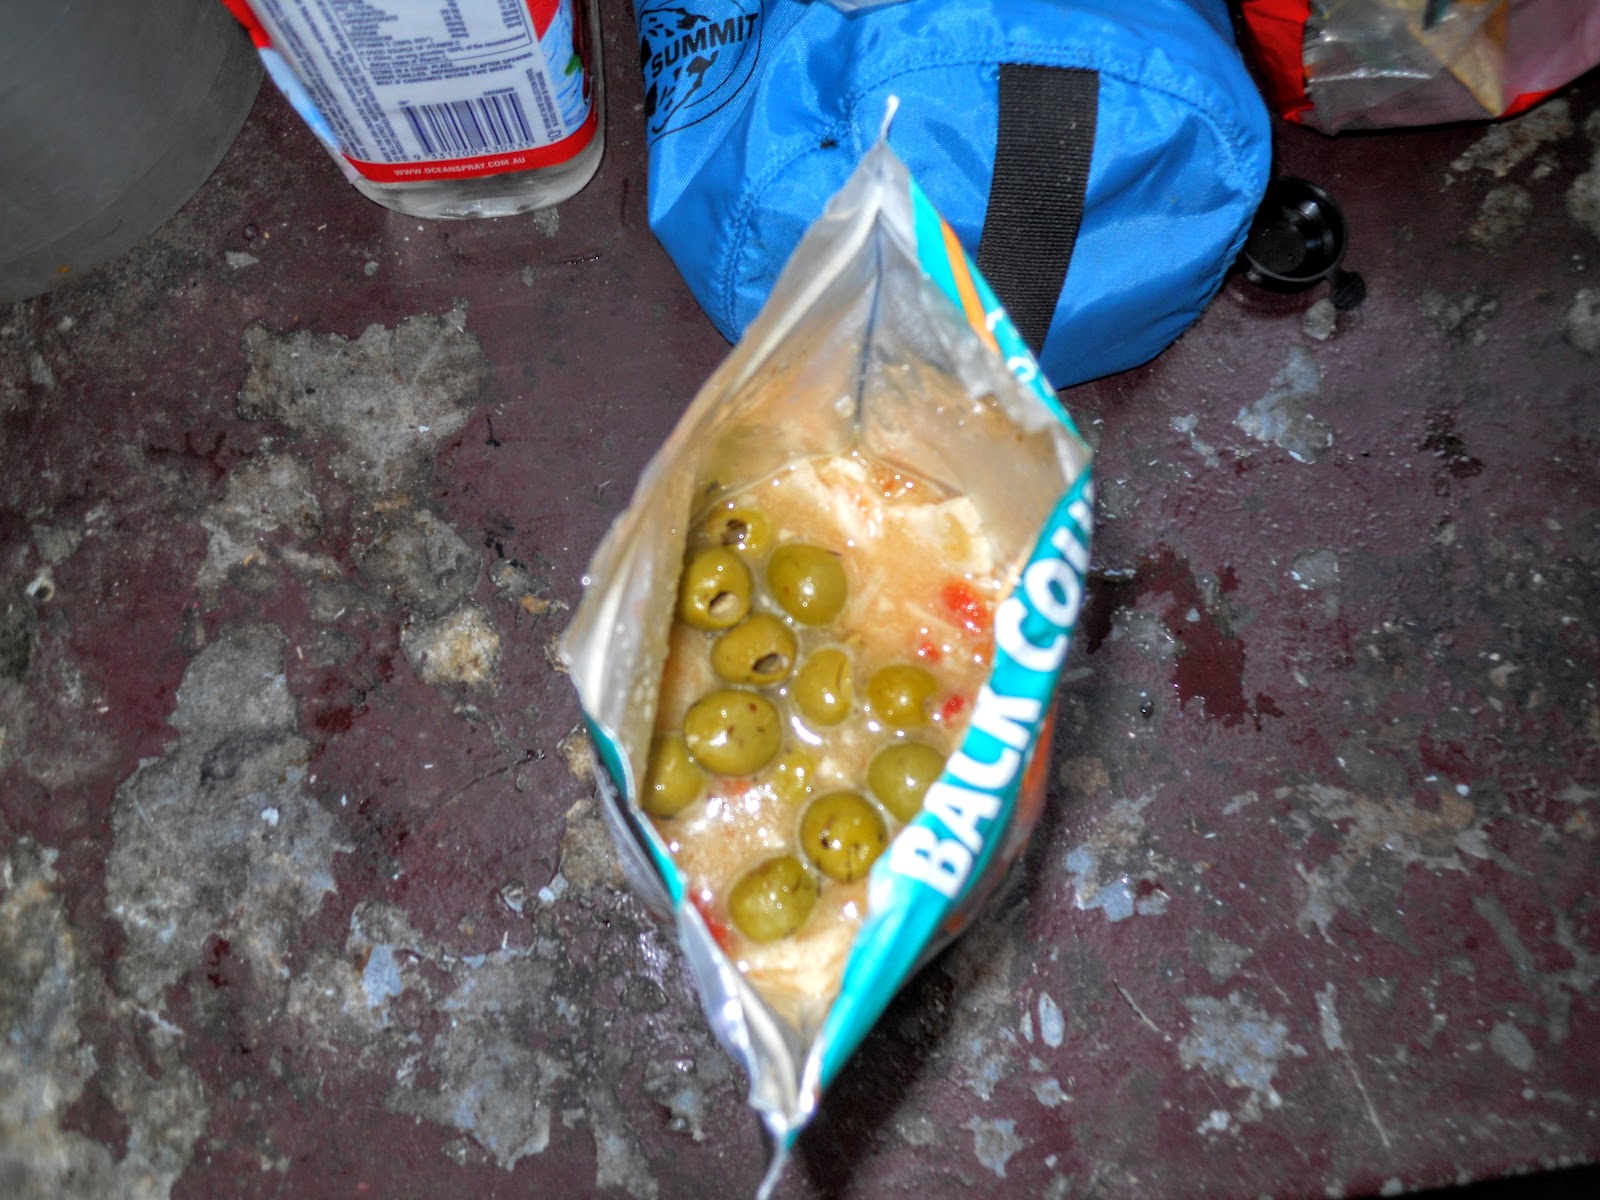
BCC Chicken Tomato Alfredo: add olives, olive oil, diced sun-dried tomatoes, mushrooms, salt and pepper

BCC Chicken Tomato Alfredo with added olives and tomatoes

BCC Morrocan Lamb: add pine and or peanuts, raisins, olive oil, dried mint/nutmeg, freshly diced garlic clove, salt and pepper (this is my current favourite BCC meal)

BCC Spaghetti Bolognaise: add diced garlic, tomato ketchup, olive oil, olives, freshly shaved Parmesan

BCC Creamy Carbonara: add sliced sautéed mushrooms, garlic, diced salami, olive oil, milk powder, salt and pepper

One of the OGC meals


OGC Lamb and Black Olives: add nuts, raisins, olive oil, dried mint, garlic salt and pepper

OGC Venison Casarecce with White Wine Sauce: Craisins, garlic, sliced mushrooms, salt and pepper


As you can see you could really go crazy with your additions the only limit is your taste buds and imagination. Just remember to keep the weight factor in mind as you could easily negate any weight savings by adding too much to your meals.


Tuesday, 13 December 2016

Kerr Bay Campground St Arnaud

Camping in St Arnaud

While most people stay at a Lodge or Bed and Breakfast in St Arnaud you can camp at Kerr Bay camp ground instead.

St Arnaud township

One of the places you will pass through on the Te Araroa is St Arnaud, it is a small town and is the administrative centre for Nelson Lakes NP.


St Arnaud Township from high on the St Arnaud Range

 The township is very small, there would be less than 50 permanent residents and it has a DOC visitor Centre, various accommodation providers, 2 cafe's and a small general store


DOC visitors centre St Arnaud

Kerr Bay Campground

There are a number of DOC camp grounds in St Arnaud but the closest one to the Te Araroa route is at Kerr Bay on the Eastern side of Lake Rotoiti.

Map of St Arnaud Township

The camp-site is very nice, it has a number of areas for tents, a cooking/eating shelter (with gas and hot water provided), hot showers, a big toilet block and a washing/ drying room. I have stayed here a couple of times and found the experience positive. 

Water Taxi jetty, Lake Rotoiti, Nelson Lakes NP

Cooking shelter at Kerr Bay


Kitchen area with gas hob, hot water

The cooking shelter is of the semi enclosed type but by this stage in your TA experience that will be the norm. There is a free gas hob but no pots or pans so use your own.


Dining area, Kerr Bay

The tent/caravan/camper sites past the bushes

Photo of some of the tent sites from the DOC website


It is located right next to the jetty for the water taxi and the terminus of Lakehead Track heading up to Travers Valley, Travers Saddle and Waiau Pass.


Start of Lakehead Track heading to Travers Valley

The camp ground can be busy especially at Christmas as Lake Rotoiti is a Mecca for boaties and the camper van crowd. Over the summer months bookings can be made on-line, other times you need to visit the DOC St Arnaud Visitor Centre, price per night is $20 NZD.