Wednesday, 16 March 2016

The Queen Charlotte Walkway I: Day 1-3: Ship Cove to Cowshed Bay


My first section of the TaT I have managed to complete this year is the section from Ship Cove to Anakiwa, following the course of the Queen Charlotte Track or QCT.
This track covers the first 71 kms of the Te Araroa in the South Island and is a relatively easy introduction to the terrain you will experience south of Cook's Strait.


On the way to Ship Cove

Day One: Ship Cove to Madsen's Camp

   I walked the track from north to south, so the first day was the section from Ships Cove to Endeavour Inlet. The ferry was about half full of walkers and half full of mountain bikers this late in the season. Personally, I was carrying all my gear as I was camping every night but most other walkers were using the cheap and efficient pack transfer system and staying at lodges/resorts. You should do this, it only costs $5 per day for a transfer and saves carrying that weight every day.

Not practical if you plan to camp every night as it does not transfer to every camp site. 

Make sure you buy one of these QCTLC Track passes before leaving Picton as you are required to have a track pass on the QCT. The cost for a 3 day pass is $12, a five day pass is $18.


The QCTLC track pass

I travelled out to Ship Cove on the 8 am Cougar Line ferry, but there are several companies which transport trampers and MTB riders to the various access points along the track. I just found Cougar was the cheapest over all for a return ticket, Picton to Ship Cove and then Anakiwa to Picton at the end of the track. 

The jetty at Ship Cove

Overview of the Marlborough Sounds and the Queen Charlotte Track (QCT)

Cougar Line water taxi

There is a very nice memorial to Captain Cook at the start off the track with several interpretative panels about his voyages and the history of the cove. Well worth a look as you will probably never visit this site again, it is only accessible by boat. Apart from the immediate area around the memorial it has been maintained as it would have been when Cook first visited.

My first Weka of the trip, many more to follow

Entry to the Cook monument

Captain Cook monument at Ships Cove

Jon at the monument

The start of the track is right at the end of the jetty and it is a rude introduction to the QCT. You walk about 10 paces and then start climbing for the next hour, the track is excellent underfoot but quite steep.

DOC sign at start of the track

QCT: Ship Cove to Madsen's


Start of the Queen Charlotte Track...

...is a bloody big hill!!!!!

Eventually you climb high enough to gain a view of Resolution Bay, as the track nears the top of the ridge it starts to level out into a more friendly gradient. It was about 27 degrees on the day, and the humidity and heat reminded me of being in the Pacific Islands.

Resolution Bay from the QCT

Typical dense bush at start of the track

3 more hours for me...

You pass through a combination of DOC land and private land holdings along this track, that is why you require a QCTLC track pass. Thick dense bush is inter spaced with regenerating bush as a lot of the land has been farmed in the recent past. 

Regenerating forest on old farm site

Resolution Bay from the QCT

Eventually you reach a high point with views out to Resolution Bay and the outer Sounds, there are a couple of picnic table here with some resident Weka to keep you company. The Weka is a NZ native bird, it is the same colour as a kiwi but looks like some strange mixture of duck and chicken. I have honestly never seen so many Weka in my life, I must have spotted well over 100 over the 5 days. 
Incredible!

NB: Weka are the most larcenous native bird, do not leave your gear unattended when they are around as they will steal it in a heartbeat. They decorate their nests with colourful and shiny booty.

Warren the weka comes to visit...

View towards Endeavour Inlet

Warren and Whilma the weka...

Your journey along the track will be punctuated by a number of interpretive signs and also distance markers. Generally they mark 10km divisions but I have seen them as close as 1-4 km's apart as well. 

Woohoo...only 61 km's to go...

After 4-5 hours on track you will get to civilisation (or at least the local version) when you reach the bach's and Furneaux Lodge near the head of Endeavour Inlet.  I absolutely stopped for a cleansing beverage and in fact was shouted a second by some American tourists I had been walking with for most of the day.

Thanks guys, I appreciated it.

Furneaux Lodge provide superior accommodation but also do drop in bar and restaurant meals if that is of interest to you. 

Holiday homes near Furneaux Lodge

Furneaux Lodge, Endeavour Inlet

Refreshed (but also slightly wobbly...two ciders, hot day, you get the picture...) I set off for my accommodation for the night at Madsen's Camp about an hour distant. Madsen's is one of two campsites in Endeavour Inlet and it was well appointed with shady campsites, clean fresh water, a good toilet, access to the ocean and solar showers on offer. Tony the owner is very welcoming without being intrusive.

For $10 per night you couldn't ask for more.

Turn off to Madsens an hour down the track

My campsite at Madsens, nice hammock

I had a shower (awesome, the water was just about too hot to be under...) and fed and re hydrated myself before taking a quiet stroll down to the jetty (lots of edible mussels for the seafood lovers...) at the bottom of the property. They must have been having a party at Furneaux Lodge as I could hear them whooping it up from a couple of kilometer's away.

View from the tent at Madsens, Furneaux Lodge in distance

Artistic shot from in the tent


Dusk at Madsen's Camp

Still looking fresh...sort of!

  So ended day one of the track.

Day Two: Madsens Camp to Bay of Many Coves Campsite

 Day Two of the trip was the longest, 23 km's to cover over 6-7 hours would take me from Madsen Camp to the campsite at Bay of Many Coves. After a good breakfast (porridge with fruit, tea and plenty of water) I was on the trail before 8 am. 
The day was much cooler than the previous one with cloud and a cold wind blowing up Queen Charlotte Sound.

Sunrise day two enroute to Camp Bay
QCT from Madsen's to Bay of Many Coves


Woo hoo... only 51 km's left

Bit of chop out on Big Bay

Very nice track between Madsens and Camp Bay
My first destination for the day was the DOC campsite at Camp Bay about 3 hours along the track. I eventually reached the site around 11 am and stopped for some lunch and water resupply. 

Coming into Camp Bay
The Camp Bay site looks really nice, there is space for about 20 tents on two terraces as well as a new shelter and easy access to the sea. I meet up with a mixed group of French and Swiss hikers here, we walked together for most of the rest of the day.

Ablution block at Camp Bay

Shelter at Camp Bay camp site

After leaving the campsite there is a 25 minute walk up a gravel road to get to Kenepuru Saddle. From here you follow the track up and across a series of ridges all the way to Torea Saddle and Portage some 24 km's distant. You need to take plenty of water with you as there is no re supply point until you get to the shelter at Bay of Many Covers over 13 km's away. 

Climbing to Kenepuru Saddle, view of Queen Charlotte Sound

You can see the group of French/Swiss trampers I was walking with for most of the day. As is common you stop and talk at similar places, so even though you don't know them well you get to meet and find out a lot about many groups of people as you walk along. These guys were off to the Abel Tasman Great Walk when they finished the QCT.

Kenepuru Saddle
 
From Kenepuru Saddle there is a long up hill slog for about 2 hours, eventually you reach point 411, this is the high point for all of the QCT. Then it is a series of ups and downs as you follow the ridge line towards Torea Saddle.

Ah....yep!


Looking South East to Queen Charlotte Sound

View down to Kenepuru Sound from Kenepuru Saddle
There are some awesome views of the Sounds from high on this ridge, make sure you take the opportunity to stop and enjoy them as you walk along...

View looking to head of Kenepuru Sound

View west of Pelorus Sound from the track

Mt Stoke to left in the far distance

The QCT crosses all of those ridge lines

The half way point 1 km before the Bay of Many Coves camp site
I arrived at the Bay of Many Coves Campsite about 3 pm, the mixed Swiss/French group I had been walking with continued on to the Black Rock Campsite. The shelter and campsite were nice, although a bit exposed to the cold wind blowing up the sound. I pitched my tent on one of the more protected tent site's in the bush behind the shelter.

I shared the campsite with a NZ/German couple overnight, we were the only occupants. 

View from the shelter at Bay of Many Coves
The shelter is a three sided affair with rainwater tanks for water, surprisingly they were almost all full as a lack of water here had been concerning me for most of the day. Watch out for the resident weka, he is a thieving beast who kept coming and looking under my tent fly for something to eat/steal.

Cheeky bugger!

Bay of Many Coves Shelter

The windward tent sites at Bay of Many Coves camp site


My tent site on the lee of the ridge

Jon in the tent early evening
I was still feeling quite chipper at the end of the day despite the 23 km's I had walked.


Day Three: Bay of Many Coves to Cowshed Bay

  Day three was a shortish day, only 13 km's and 5 hours of tramping to get to Torea Saddle and from there to Cowshed Bay Campsite. It was a bit windy but the track is surrounded on both sides by thick bush for most of the day so the wind did not have the effect it might have in a more open area. 
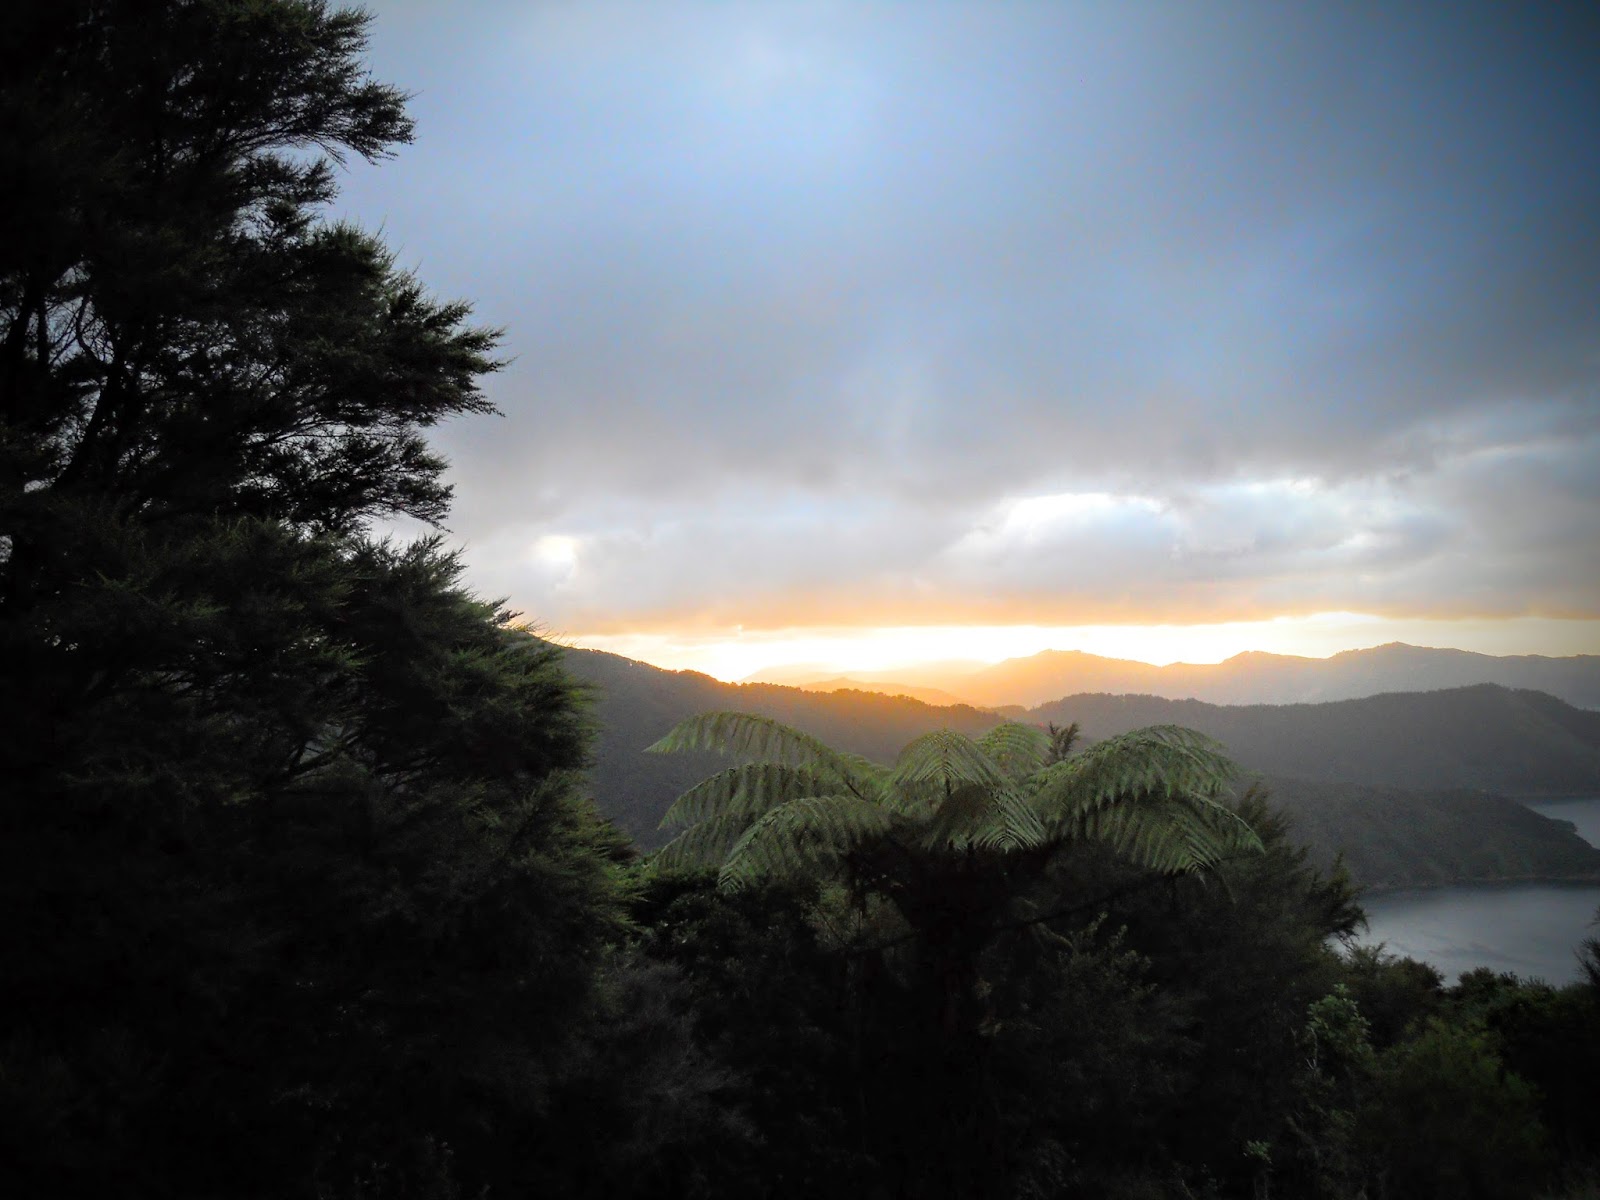
Beautiful sunrise at Bay of Many Coves
QCT from Bay of Many Coves to Cowshed Bay

Nice sheltered track on a cold windy morning

View of Queen Charlotte Sound
I was heading for Torea Saddle which is above the headland jutting out into Pelorous Sound from the left in the photo below.

The ridges I will be covering over the day

Interislander ferry on way to Wellington

Some nice areas of bush alongside the track


Jon en route to Black Rock Shelter

Atmospheric conditions over Queen Charlotte Sound
Picton in the extreme distance
You get your first view of both Picton and Anakiwa about two hours after leaving the camp site at Bay of Many Coves. It is also possible to see the course of the track as it sidles up and down the ridges. 

Closer view of distant Picton from QCT


Jon on the Queen Charlotte Track

Take heed MTB'ers, they mean it....

The Blueridge ferry coming up Pelorous Sound

3/4 er's of the way there....

First view of Anakiwa in the far distance
I stopped at Black Rock Shelter for lunch and it was an excellent looking site with a newish shelter and well concealed tent sites. Plenty of good water in the rain tanks as well...

Black Rock Shelter

View from inside Black Rock Shelter

Lunch and brew in the shelter
I tried one of the new Back Country Cuisine soups for lunch and was most impressed, it was delicious.This one was chicken, corn and noodles it had a full flavour and big meaty chunks of chicken it it. Yum!

I will definitely be buying more of these in the future.

My tasty soup lunch

Slowly counting down the distance...
When you get to Torea Saddle there is a track which leads directly to the DOC camp ground at sea level. It takes about 20 minutes and starts just to the right of the DOC map board in the photo below. 

Torea Saddle with view to tomorrow's track

The war memorial at Torea Saddle


I stayed the night at the DOC Cowshed Bay campsite, it was busy as it had two school groups already in residence. It is in a nice spot right on the shoreline with fine views of Pelorous Bay and good amenities right next to the camp sites.

Shelter at Cowshed Bay camp site
Toilet and cooking shelter, Cowshed Bay


My beach side tent site,  Cowshed Bay

We are climbing over that tomorrow...

Pelorous Sound from camp site

Portage in the distance
I was entertained for most of the afternoon by a goodly number of native birds singing and generally carrying on in the stand of fruit bearing trees along the shoreline. I've taken a short video, hopefully you can hear them...
Video of birdsong as dusk approached
I spent a lot of time either on the beach or sitting in the shelter, as there is a lack of actual grass to sit on near the tent sites. The campsite was totally full by the end of the day with numerous camper vans as well as seven different groups of trampers and two large school groups. 

Jon sitting in the Cowshed Bay shelter
If you are staying at the camp ground and fancy a meal you can head 200 meters along the shoreline or road and eat at one of the restaurants at Portage Resort.

I hear the food is excellent if slightly pricey (as is to be expected so far from a major town...). 

Fancy a tasty cooked meal?...go to Portage

Bellbird in tree, Cowshed Bay camp site
  I slept well that night despite the strong winds which blew in after dark, the sound of the nearby ocean was quite calming. I was quite dusty though as the grass on the tent sites had been killed off by the mass of people staying here over the last 3-4 months. If you have a choice go for the upper campsites as they were still green and shady, and only another 30 meters away from the shoreline.

Days 4 and 5 would see me walking the remainder of the track covering the area between Torea Saddle and Anakiwa...


My TaT over the 2015-2016 Season

I had various plans for walking a number of TaT sections over the summer, unfortunately the lousy weather this year has put paid to most of them. In particular I was forced to cancel my Harpers Pass trip as a big storm rolled in and I've had to put off two attempts on the Mingha-Deception Route for similar reasons.

Not wanting the 2015-2016 Summer to be a total wash out I decided to do a cheeky tramp of the first section of the TaT in the South Island, the Queen Charlotte Walkway.

With that in mind, I give you my section hike of the Queen Charlotte Track...

Jon on the QCT, March 2016
NB: I'm still hoping to get in a tramp of the TaT section between Arthurs Pass and the Rakaia before winter but it is totally reliant on the weather...

Tuesday, 27 October 2015

What to do with the Otira River?

One of the TaT Sections I will be tramping this summer is Harpers Pass from near Otira to Windy Point at Lewis Pass. I am walking this one NOBO to take advantage of better public transport links over Arthurs Pass. One of the decision i need to make is how to deal with the Otira River, potentially a difficult river crossing.

I thought my processing of the problem might be of interest to others.


Aickens Corner-Otira Flood track-Morrison Bridge

 Every Te Araroa tramper will need to deal with the Otira river in some fashion or another. You need to either cross it or circumvent it regardless of your ultimate destination.

You basically have three options:


  • cross the Otira river at the end of the Taramakau Valley, this is called Aickens Corner
  • closely follow the course of the river to the Morrison footbridge or Deception river route
  • use the flood track between the Taramakau and Morrison footbridge

Crossing the Otira at Aickens

The Otira is a medium sized braided river, at the height of summer it is usually easy to cross if care is taken. There are clear instructions in the TA track notes detailing this option. However, because of the topography of the river catchment ANY rain will swell it considerably. If you find the river impossible to cross you need to use the Morrison footbridge option. 

The Morrison footbridge over the Otira River where the Otira and Deception rivers merge
You can see from the photos above and below that the Otira while not overly wide can be very deep in places. I would estimate the maximum depth on this day to be about waist deep on me or approximately 1-1.3 meters. Doesn't sound like much but it would be enough to knock me off my feet.

Obviously, late in summer it will be a lot lower than now but any crossing would still need to be carefully considered. More than one tramper has been swept away at Aickens so be aware of the danger there. 

View from bridge over Otira river

The Morrison foot bridge options


The Morrison footbridge is the start point for the Mingha-Deception track as well as the end point of the Otira Flood track to the Taramakau. It provides a safe all weather crossing point of the Otira River if required. 

The first option for accessing the bridge is by following the course of the Otira river along its banks. This will take about 1.5-2 hours. There is no formed track and at several points you would need to cross the river to avoid bluffs. If the river is running high then this is not a possibility. 

The second option is the Otira flood track between Aickens Corner and the Deception river. This climbs above the bluffs and sidles across the side of the hills. Going on current information it appears this track is rough, with some slips and windfall. Times quoted range from 2-4 hours to complete, it is difficult to narrow this down. It is a longer option but definitely the safest. I would love more information about track conditions if you have them.  

Flood track runs along side of range
You can see how dense the bush is on the western side of the Southern Alps, there is a track there, you just cant see it. The track runs between 20 and 40 meters above the level of the river. 

View of track area moving West

After sidling the hills it eventually drops down to the river flats at the confluence of the Taramakau and Otira rivers. From there it is a hard right turn and the start of the slog towards Harpers Pass. 

View West towards Taramakau-Otira confluence

Personally, I would be inclined to take the safer option and cross on the bridge, the Otira is probably the most difficult of the three rivers you need to cross at the start of this track. Note that the Otira flood track is also the recognised route suggested on the TaT trail notes and website. On the day, the decision is yours to make, but hopefully this post has given you good information about the options available. 

Tuesday, 20 October 2015

Who will I encounter when tramping in New Zealand

You are likely to encounter a wide variety of people as you make your way along Te Araroa, not all of whom will be tramping the trail. Few of the tracks, trails and routes you will be following are Te Araroa specific. They are part of the much wider trail network we have in NZ, most of which you will probably never visit.

Here are some groups of people you are likely to meet in your travels.

No-one, that's right buddy just you!

Yep, you could quite conceivably go days on end without coming across another soul. Less likely now the trail is growing in popularity, but at least 50% of the time I find myself alone in huts. So will you.You should remember that New Zealand is 30% larger than the UK with about a tenth of the population.
Its empty (relatively speaking) out here.

This is fine if you don't mind being by yourself and you are a capable tramper. If that does not sound like you, then brother, you got problems....

Squirt, the Old Man and Stinky Pete: Te Araroa hikers

You will most likely encounter other folk walking the trail either as through or section hikers. This is especially likely if you are walking north bound as most TA hikers go from North to South and need to cross your path. There will be some sections where you will only encounter other TA trampers, the tracks are just not used by anyone else. Examples of this would be the sections between the Rakaia and Wanaka, almost all of these trails are only walked by TA hikers with the very occasional Kiwi being the other small group.
Gerald, Kiwiscout and James, TA 2014 from; Kiwiscout Walks Aotearoa

If you are lucky, you will meet other TA trampers who will be happy to continue the trail with you as a group, the biggest group I've struck so far was 12 all moving together.More common are groups of 2-5 walking together.

Look for other TA trampers in the rest towns like Wanganui, St Arnauld, Hanmer, Arthurs Pass, Wanaka etc. they stand out like a sore thumb.

Sven, Yuki, Greta, Jakob and Robbo the Aussie...

Wilkommen, Bienvenue, Yōkoso...Welcome, come on in....

New Zealand is an overseas visitors paradise, especially for those interested in the outdoors. There would hardly be a spot anywhere in the country that some backpacker has not visited.  I have spent time in huts with people from 27 different countries at one time or another. Language may be a problem but make sure you talk to people from other countries, you would be surprised how similar we all are under that cultural baggage we carry around...

The outdoor "weekend warrior"

This group comprises everyday Kiwi trampers/climbers out for a day or multi day tramp/ascent. You will probably not encounter too many of these folks. No offence to you, but they generally visit places where people are not;  for the most part; hard arsed bush on the West Coast of the South Island, the Kaimais, Ruahines, Kaimaniwas, Southern Alps and Fiordland.

A typical group of kiwi trampers from the WTMC

Kiwi trampers can sometimes seem a bit standoffish at first, don't be offended, it is just our nature.  We will eventually warm up and you will find most of us interesting and generous to a fault.I make a point of talking to anyone I see on the trail or at a hut because you never know what excellent advice, information or story they might have to pass on. You should do the same.

We will often give you a ride to civilisation if our paths cross at the right time. Don't be afraid to ask.


Hunters and Collectors


New Zealand has a long history of hunting, trapping and fishing so you are quite likely to meet Kiwi hunters and anglers on the Trail. I do the odd spot of fishing myself. There is a strained relationship between trampers and hunters in NZ but some of the most interesting people I have meet while tramping have been hunters.
Its all about the person, not the sport they engage in.

Not just men hunting in New Zealand...

Just show a bit of understanding for each other and you will have no problems. And you might just score a whiskey, tasty trout (best cooked in a bit of tin foil with a sprinkle of salt and squeeze of lemon) or venison back steak for your troubles...

We do this for a job...

You will almost certainly encounter workers from the Department of Conservation, or DOC as we refer to them in NZ. They can be New Zealanders or volunteers from other countries depending on the role. Most are really cool and totally passionate about the environment. You are most likely to encounter them at the various DOC offices, as hut wardens and occasionally in the field.

Some can seem overly officious, especially if they believe you are doing something wrong. Hey, I might be slightly peeved if I turn up at a hut (which is also my home) and find mud, food and wet gear all over the place, you would too! These women and men work hard at their jobs, and it is not always an easy job, so again show them some respect.

DOC Ranger at work

Just take them as you find them and remember, they will most likely be the first people coming to look for you if you get into difficulties.

For a happy life, pay your hut fees!

No, I mean it, pay your hut fees!

There is nothing more likely to get a DOC hut warden (or a kiwi tramper) riled up than turning up, using and abusing a hut and then not paying for it. A six month DOC Hut pass is $90, that is nothing compared to the $600 pack and $2-3000 worth of other gear you are carrying.
Pay up.

Wednesday, 7 October 2015

Some thoughts on food for the Te Araroa Trail

Trail food as fuel or a source of enjoyment?


I have seen some TA trekkers eating truly horrible food and I cannot understand why. Sure there are issues with weight and the availability of suitable ingredients in remote locations, but this doesn't mean you need to eat like a savage.  Personally, I want to enjoy my trail food, so I take meals that are going to be tasty, nutritious and enjoyable.

Typical hikers gruel; rice, porridge.....who knows?

With a bit of thought and good pre-planning you can both eat well and still be light weight. 

Eat well to maintain condition

You need to eat properly when on a long distance tramp, this means including all of the basic elements of a "off trail" diet to maintain peak condition.

A quick bit of lunch on the trail...

I use 24 hour rations utilising whole foods, dried foods and freeze dried meals. What I am looking for in my tramping food is:

  • high calorific density, a lot of calories per weight
  • light weight ingredients, small compact size
  • has taste variety, and
  • easy to prepare. 

The calories you consume should be around 15% proteins, 50%-65% carbohydrates, and 20%-35% fats. You also require a complex mix of minerals and vitamins. While you can take supplements, these should primarily come from your food. Trace elements become even more important when trekking for any period as you are slowly depleting the reserves of these in your body.

Weight is important, too much food weight = hiking failure. This tends to limit your food choices to dried items, salted/cured meats, powdered items and small packets of ingredients.

A days worth of meals... 

Here is a look at my typical daily tramping diet; this provides me with the sustenance I need to keep me walking for 6-8 hours per day. I have three meals a day: Breakfast, Lunch and Dinner, dinner is often my only hot meal of the day.

Breakfast

A good breakfast is especially important when doing a multiday tramp. You need the energy of the food you consume to keep you going for the first 3-4 hours of the day. 

Days meal for the St James Trip in February 2015


Typically I have:

  • Cereal: Not breakfast cereals,  instead think of porridge (I like Uncle Toby's instant oats), cream of wheat, muesli (all with sugar, dried fruits and reconstituted milk powder). I have also started eating rice porridge, which is very nice. These all contain the classic trinity: carbohydrates/protein/fats all in one.

Cream of wheat is good!

  • Sometimes I have baked items: breakfast biscuits or fruit digestives with jam (in the army we used to layer them with raspberry jam and condensed milk, messy but good). Crossiants/bagels/sandwiches also feature. Toaster pastries are a good choice as a quick no cook breakfast option. 

Pop tarts for breakfast...I like cherry flavour!

  • Freeze dried single serves: if I will be having a long or hard day a single serve of a freeze dried meal goes down a treat. Freeze dried dessert items are also excellent breakfast options. Just need hot water and no mess to clean up as you just eat it right from the bag.

A Backcountry single serve meal

  • Protein: a few slices of salami, some beef jerky, a cheese wedge/slice (Babybel are very nice), bacon slice etc.

Babybel cheese wedges

  • Drinks: Lots of people don't brew up in the morning but I need a big mug of tea to get going. I always drink black Earl Grey with a sugar substitute. Very occasionally a coffee with a big dollop of sweetened condensed milk in it, it is a valued kiwi tramping tradition and so delicious. I also hydrate with at least a litre of water if possible.
Having a brew on the QCT, February 2015

Lunch

Some people can get by with a muesli bar and a swig of water for lunch, but if you are walking for 6-8 hours this is not going to provide you with the calories you need. Generally I will be eating my lunch sitting on a rock/log somewhere so it needs to be portable. 

Tuna and crackers are a stable of my tramping meals

My lunch tends to consist of:

  • Carbohydrates: Bread, crackers, bagels, wraps, tortillas, Tararua biscuits, instant noodles if it is cold and I'm in a hut/tent
  •  Protein: Salami, sliced meat, smoked chicken, tuna, cheese, pate, peanut butter, smoked fish
  • Extras: An occasional treat like olives, sun-dried tomatoes, spreads/dips/pesto etc.

A standard lunch would be 4-5 crackers with a slice of cheese, salami or peanut butter on them. If I have chocolate then lunchtime is when I will eat it. My current favorite is spinach wraps with tuna/salami, sliced tomato and cheese.


My favourite brand and type or lunch wrap: Farrahs Spinach


I have found a source of small tins of shelf stable pate that weigh only 47 gms each, I keep these for the end of a tramp.

One of the Henaff range of French Pate's

I try lots of other things but this is what I always come back too:


Tuna again, on the trail between Christopher and Anne Hut, 2014

I normally drink water at lunchtime but will also occasionally have a powdered Iced Tea or fruit drink.

Snacks

You need a few snacks during the day to keep you going, or as an energy boost if you start flagging. I tend to be quite pedestrian in this area as there are only a few things I like to snack on.

 My main go to snacks would be:
  • peanut M & M's/fruit and nut chocolate/LCM bars
  • jerky/salami sticks/salami strips
  • small packets of olives (oh so good, multiple varieties now)
  • Raisins or dried apricots/pineapple/apple/dates etc
  • Nuts (they must be salted) including peanuts, cashews, brazils or pecans

My favorite snack- Raisins!

I have been taking individual packets but you end up with a lot of waste paper & packaging. I will be carrying these items in bulk from now on. 

Dinner

Some people have their main meal at lunchtime but I prefer to have a hearty meal at the end of the day, almost as a reward for completing that days journey. Generally my meals are home-made freezer bag meals, easy packet meals or freeze dried items.

I'm assuming you are a through hiker from another country you don't have a food dehydrator and aren't able to bring food items into the country with you.

But first.....

...Start with soup 

I always start my dinner meal with some soup; it is quick, nourishing and delicious. When I am long trail walking I will carry packets of dried Cup of Soup. If I was tramping I would still take soup, but it would be a dried variety that needs 5 minutes of simmering.

Either a Cup of Soup, or...

...a dried Simmer soup

Miso Soup paste is something I also enjoy...it is great for replacing salt lost during the day and I find it to be quite soothing on the stomach.

Then have your main....

 Below are a variety of dinner meal ideas you could try including freezer bag, commercial freeze dried and packet meals. I have included the percentage of each I nominally carry.

1. Freezer Bag meals (60% of the time)

I like to make my own "freezer bag" meals, they contain dried ingredients inside a freezer bag hence the name. These can be eaten in the bag or from your pot.

A selection of freezer bag meals

If you own a food dehydrator you can go bananas and dehydrate anything: pork, lamb, beef, vegetables, fish heads, whole meals - go for it.

Some blanched cabbage going into the food dehydrator...

Feel like a Dolphin fritter with an Herbe vegetable medley - yuck, ya sick bastard, but if you must...

All meals will include the following elements: carbohydrates, protein and flavoring.

 Firstly the Carbohydrates:

Into a sandwich sized freezer bag add:
  • pasta (only 3 minute quick cook varieties)
  • noodles (instant/soba/udon/rice noodles)
  • instant rice (freeze dried variety, just add water)
  • cous-cous, tabbouleh, falafel etc.
  • cracked wheat, quinoa (or some other easy cook grain)
  • or instant potato (Maggi is good so are Idahoan if you can find it).

To these I add some form of protein:

  • tuna/salmon/smoked fish ( I really like kippers and tinned herring),
  • salami chunks, smoked chicken, sausage, bacon
  • dehydrated pork/lamb/venison/beef pieces
  • reconstituted jerky 
  • Texture Vegetable Protein (TVP, this is usually soya based)
  • cheese (hard cheeses last a lot longer than the soft variety
  • and freeze dried mince.

Then some vegetables for vitamins, such as:

 Surprise brand peas/beans, freeze dried mix veges, dehydrated corn/cabbage/capsicum, mushrooms, dried onions and fresh garlic/ginger/carrot shavings.

Freeze dried Surprise Peas

For flavour I add:

 Dried soup powder, cheese sauce powder, low MSG bouillon, dried shallots, olive oil, spices and herbs to taste. 

A really excellent book on this method is by Sarah Svien Kirkconnell, Freezer Bag cooking: trail food made simple, there is also a website.

Freezer bag cooking, Sarah Svien's book

Have a look on-line, there are a lot of sites showing you how to make these kind of meals.

2. Packet meals (20%)

I eat these occasionally, this group includes Continental/Maggi pasta packs, rice sides, Diamond/Kraft Mac and Cheese, Italian inspired pasta meals and Asian style pre-packaged noodle meals. I also occasionally use the Indian boil in bag offerings from MTR, they are tasty.

Paneer Butter Masala: one of the MTR ready meal range

Because these all require simmering I usually only take one of these meals on a trip longer than 4 days. Again I will chuck some salami, tuna, chicken and vegetables in with them.  

Continental Pasta sides

Leave all the packaging behind and just chuck them in a ziplock bag with any required instructions.


3. Freeze dried meals (20-60% depending on trip length)

Back Country Cuisine (BCC) are a New Zealand company who make a wide variety of freeze dried meals and they are delicious, lightweight and just need hot water.

Some of the BCC freeze dried range

They are expensive ($10-$17 NZD each), and most people find that they require a 2 person serve to feel full.  If I am using Backcountry I will only use the single serve packs as I just cannot finish a whole larger serving by myself. 

A large serve of Jamaican Goat Curry....she's a spicy...!!!!

  I occasionally take these freeze dried meals with me, usually one per 5-7 day trip.

My favorite ones are:

  • Honey Soy Chicken
  • Spaghetti Bolognaise, go a bit short on the water or it is very soupy
  • Roast Lamb with vege's & mashed spud (damn fine)
  • Lamb Fettuccine
  • Chicken, Tomato Alfredo
  • Moroccan Lamb (more like a cous-cous Tagine and really tasty...)
  • Smoked Fish Pie
  • Cooked Breakfast...I like it but most people do not!

Eating a BCC meal in Hawdon Hut 2014

BCC also make freeze dried mixed vegetables, instant spuds, minced beef and instant rice which are all really useful as additives to your own meals. They also have a range of instant soups which with bread or crackers make for an excellent lunch.

BCC Chicken, corn and noodle soup at Black Rocks Shelter, QCT in 2015

Another freeze dried company here in New Zealand are Outdoor Gourmet Company and Real Meals, these are not as easy to find as they are much smaller businesses.  The Outdoor Gourmet meals are much nicer than Backcountry Cuisine but they cost more...if you can find them cheap buy them.

Chowing down on an Outdoor gourmet meal and Dutch Curry Soup, Abel Tasman Coast Track

The Real Meals is a newer company based in Nelson and their entrees are available in a variety of stores across the country. Their Cheesy Mash is gorgeous as is their Wilderness Stew, both are recommended. Real Meal desserts make great breakfasts I especially like the Apples with Rice Pudding.

Some of the Real Meals range

You can also bring your own from your country of origin but check with NZ Customs to make sure you are allowed to bring them into the country.

Drinks

I always finish my meal with a brew; usually black tea with sugar substitute plus a powdered fruit drink or an Iced Tea mix. 

A complete meal: Miso soup, BCC Roast Lamb and fruit drink

Powdered fruit drinks are great as you will soon get sick of drinking multiple liters of plain water each day. I tend to use ones with artificial sweeteners as they are lighter. Brand names include Raro, Vitafresh, and Nestle. 


One of the flavors in the Vitafresh range

Flavored electrolyte powders are also available in New Zealand, the main brand is Vitasport.

An example from my own journeys...

Here is five days worth of food laid out ready for the food bag. As you can see I like to carry my meals as a 24 hour ration, a hold over from my army days.  This is from my 2015 hike of the St James Walkway, part of which is on the Te Araroa.

Meals for 5 days tramping packed

 Have a look at the article about this menu on my general tramping blog.

A days ration laid out prior to a tramp...

A days food or "ration" is in its own plastic bag, containing everything I will need food wise on that day. The average of these meals is 650 gms which is within the accepted weight range for roughly 2500 calories a day.

  Other considerations

 Here are a couple of other things to consider when planning trail food. 

Salt/Pepper

This is slightly controversial but you need to salt your food when you hike long distances. Salt contains a variety of trace elements your body needs to work, if you do your normal thing and skimp on the salt you are going to get muscle cramps, muscle spasms, headaches and nausea.

Salt/pepper catering sachets

 Don't go crazy, just a sprinkle will do, I take those little sachets of salt you get from fast food restaurants. If you do start having salt induced problems take about 150ml of water and add 1/2 teaspoon of salt and 1/2 teaspoon of sugar as an electrolyte fix. 

Pepper is good on everything, as is hot sauce, Worchester sauce, chilli and olive oil!

Fresh Vegetables

A selection of sliced vegetables

Yes, of course take fresh fruit and vegetables but bear in mind they are much heavier than the dried varieties. I recommend apples, oranges, onions, capsicum, garlic, chillies, carrots and ginger all of which survive well in a pack.

Some further ideas...

I have included a link to the Gustofrenzy site which has a great article on the actual foods this couple used while walking the Te Araroa Trail.


Great article about TA food from the Gustofrenzy website

And here is another trampers interpretation of these same guidelines, this is from fastforwardlife.

Fastforwardlife interpretation of these food guideline

So there you go, a few ideas for meals while you are walking the TA.